YOLOv10, launched on Might 23, 2024, is a real-time object detection mannequin developed by researchers from Tsinghua College. YOLOv10 follows within the long-running collection of YOLO fashions, created by authors from all kinds of researchers and organizations.
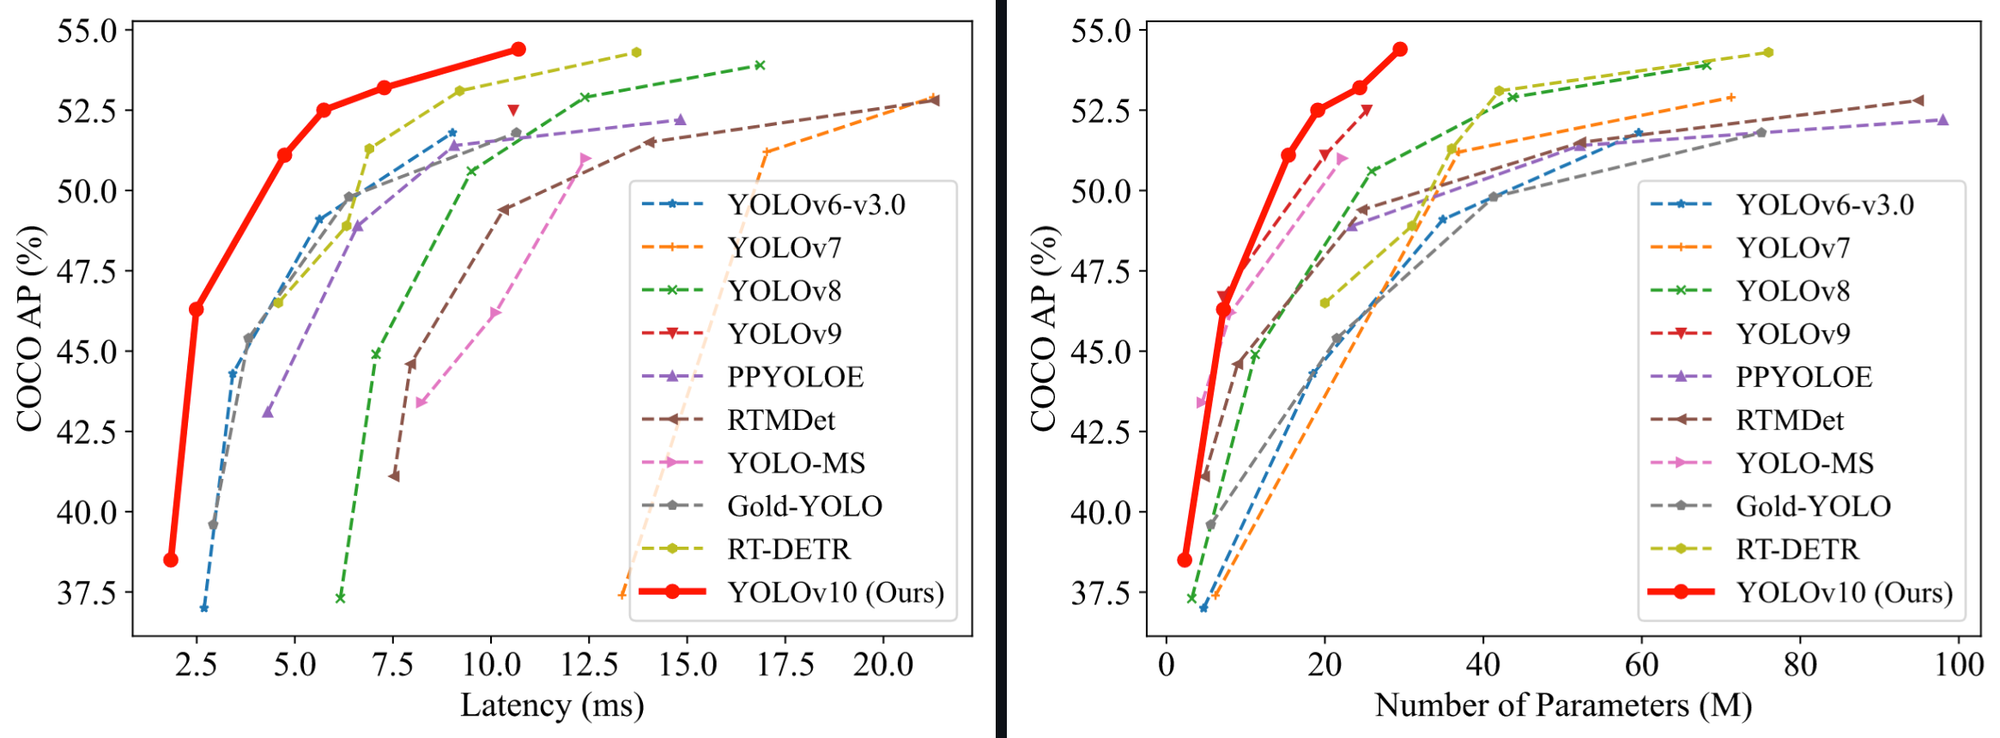
As of Might 2024, YOLOv10 represents the state-of-the-art in object detection, attaining decrease latency than earlier YOLO fashions with fewer parameters.
When it comes to efficiency, the YOLOv10 paper notes “our YOLOv10-S is 1.8× quicker than RT-DETR-R18 underneath the same AP on COCO, in the meantime having fun with 2.8× smaller variety of parameters and FLOPs. In contrast with YOLOv9-C, YOLOv10-B has 46% much less latency and 25% fewer parameters for a similar efficiency.”
On this information, we’ll present you easy methods to fine-tune a YOLOv10 mannequin utilizing the code launched by the Tsinghua College analysis workforce.
With out additional ado, let’s get began!
Step #1: Set up YOLOv10
To get began, we have to set up YOLOv10. YOLOv10 doesn’t have an official Python bundle, so we’ll set up the mannequin from supply.
We’ve created a Colab pocket book with all of the steps it’s worthwhile to comply with this information.
To put in the mannequin, run:
!pip set up -q git+https://github.com/THU-MIG/yolov10.gitThen, you have to to obtain the mannequin weights to make use of with the mannequin. You are able to do so utilizing the next instructions:
!mkdir -p {HOME}/weights
!wget -P {HOME}/weights -q https://github.com/jameslahm/yolov10/releases/obtain/v1.0/yolov10n.pt
!wget -P {HOME}/weights -q https://github.com/jameslahm/yolov10/releases/obtain/v1.0/yolov10s.pt
!wget -P {HOME}/weights -q https://github.com/jameslahm/yolov10/releases/obtain/v1.0/yolov10m.pt
!wget -P {HOME}/weights -q https://github.com/jameslahm/yolov10/releases/obtain/v1.0/yolov10b.pt
!wget -P {HOME}/weights -q https://github.com/jameslahm/yolov10/releases/obtain/v1.0/yolov10x.pt
!wget -P {HOME}/weights -q https://github.com/jameslahm/yolov10/releases/obtain/v1.0/yolov10l.pt
!ls -lh {HOME}/weights
These weights are educated utilizing the Microsoft COCO dataset.
YOLOv10 relies on Ultralytics’ mannequin code, and incorporates a fork of their code for inference. Thus, we’ll see from ultralytics imports on this information, which use the customized ultralytics codebase included within the YOLOv10 repository we pip put in earlier. You don’t have to run any further instructions to make use of this forked code.
We are able to take a look at our mannequin is working utilizing the next code:
from ultralytics import YOLOv10 mannequin = YOLOv10(f'{HOME}/weights/yolov10n.pt')
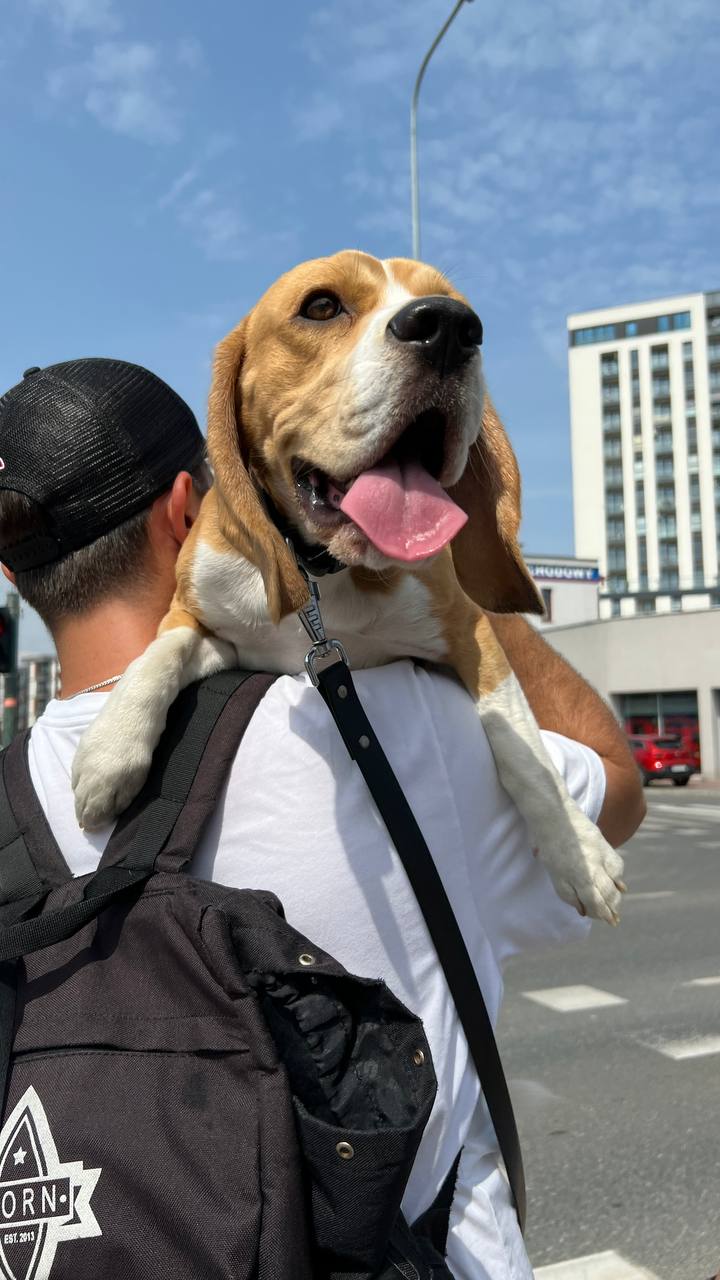
outcomes = mannequin(supply=f'{HOME}/knowledge/canine.jpeg', conf=0.25)
print(outcomes[0].containers.xyxy)
Let’s run our mannequin utilizing the default yolov10n weights on the next picture of a canine:
Our mannequin ought to return predictions like this:
tensor([[6.7041e+01, 2.5264e+02, 6.4549e+02, 9.6621e+02],
    	[7.4646e-01, 3.4156e+02, 5.4170e+02, 1.2773e+03]], machine='cuda:0')
We are able to visualize our predictions utilizing the supervision Python bundle. You’ll be able to set up supervision utilizing the next command:
pip set up supervisionYou’ll be able to visualize the predictions utilizing this code:
import cv2
import supervision as sv detections = sv.Detections.from_ultralytics(outcomes) bounding_box_annotator = sv.BoundingBoxAnnotator()
label_annotator = sv.LabelAnnotator() annotated_image = bounding_box_annotator.annotate( scene=picture, detections=detections)
annotated_image = label_annotator.annotate( scene=annotated_image, detections=detections) sv.plot_image(annotated_image)
Our code returns:
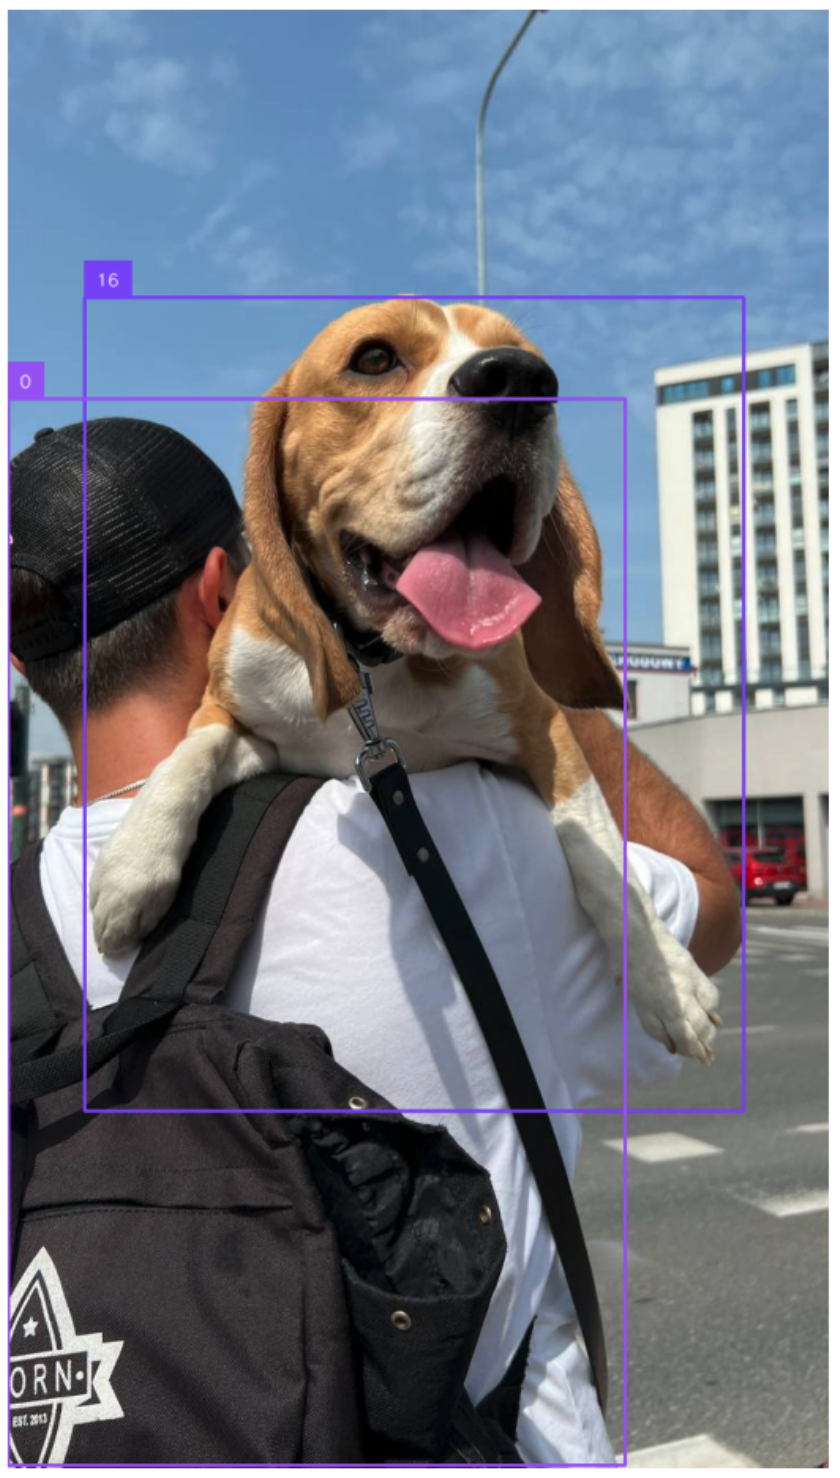
The mannequin, the pre-trained checkpoint educated utilizing the Microsoft COCO dataset, efficiently recognized the canine and individual within the picture.
Step #2: Put together a Dataset
With our mannequin put in and weights prepared, the subsequent step is to arrange a dataset to be used in coaching.
If you don’t have already got a dataset, you will discover over 250,000 public datasets to be used in coaching fashions on Roboflow Universe, the most important group of open laptop imaginative and prescient datasets on the internet.
For this information, we’ll practice a mannequin on a soccer participant detection dataset accessible on Roboflow Universe.
If you have already got labeled knowledge, ensure your knowledge is within the YOLOv8 PyTorch TXT format, the format that YOLOv10 makes use of. You’ll be able to convert your knowledge into the YOLOv8 PyTorch TXT format utilizing Roboflow. Discover ways to convert your knowledge.
To obtain our dataset from Universe, we are able to use the next code:
!mkdir {HOME}/datasets
%cd {HOME}/datasets !pip set up -q roboflow from roboflow import Roboflow ROBOFLOW_API_KEY = “” rf = Roboflow(api_key=ROBOFLOW_API_KEY)
venture = rf.workspace("roboflow-jvuqo").venture("football-players-detection-3zvbc")
dataset = venture.model(1).obtain("yolov8")
Above, substitute:
- ROBOFLOW_API_KEY along with your Roboflow API key.
- “Roboflow-jvuqo” along with your Roboflow workspace ID.
- “Soccer-players-detection-3zvbc” along with your Roboflow mannequin ID.
- 1 along with your Roboflow mannequin ID.
Discover ways to retrieve your Roboflow API key.
Discover ways to retrieve your Roboflow workspace and mannequin IDs.
This code will obtain our dataset to be used in coaching our mannequin.
Step #3: Prepare a YOLOv10 Mannequin
With our dataset prepared, we are able to begin coaching our mannequin. To take action, we are able to use the YOLO command line interface accessible with the YOLOv10 supply code:
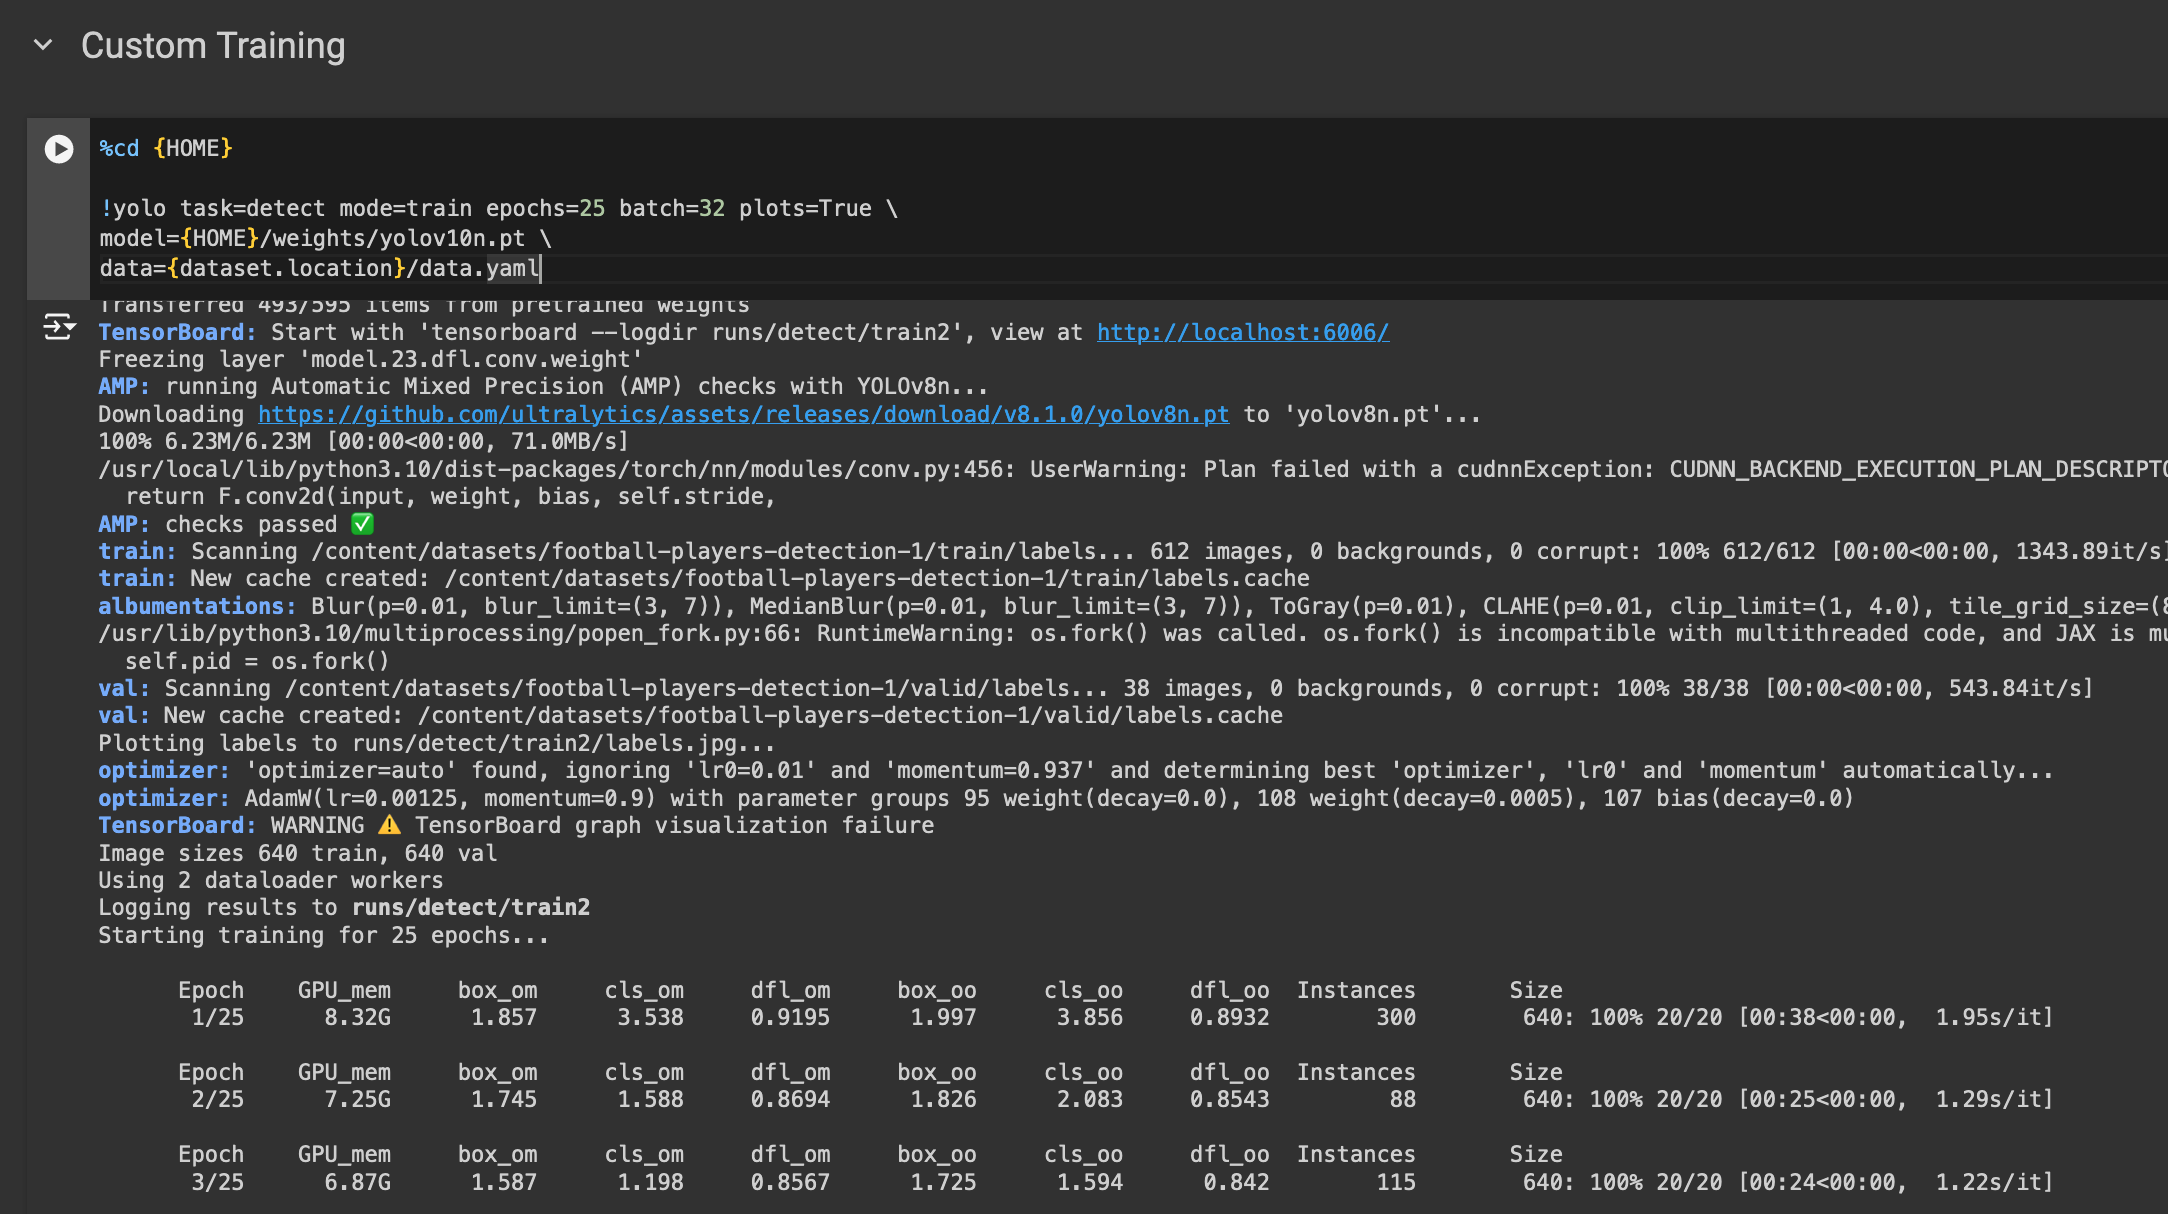
%cd {HOME}
!yolo job=detect mode=practice epochs=25 batch=32 plots=True
mannequin={HOME}/weights/yolov10n.pt
knowledge={dataset.location}/knowledge.yaml
Within the above command, we begin a coaching job for 25 epochs utilizing our customized dataset. If you run this code, you will notice an extended output from the command line and coaching will begin. You’ll be able to monitor the efficiency of your coaching job because the mannequin trains.
Our mannequin achieved a 62% mAP on 25 epochs.
We suggest coaching for 100 epochs for optimum efficiency. We educated on 25 epochs above for testing functions.
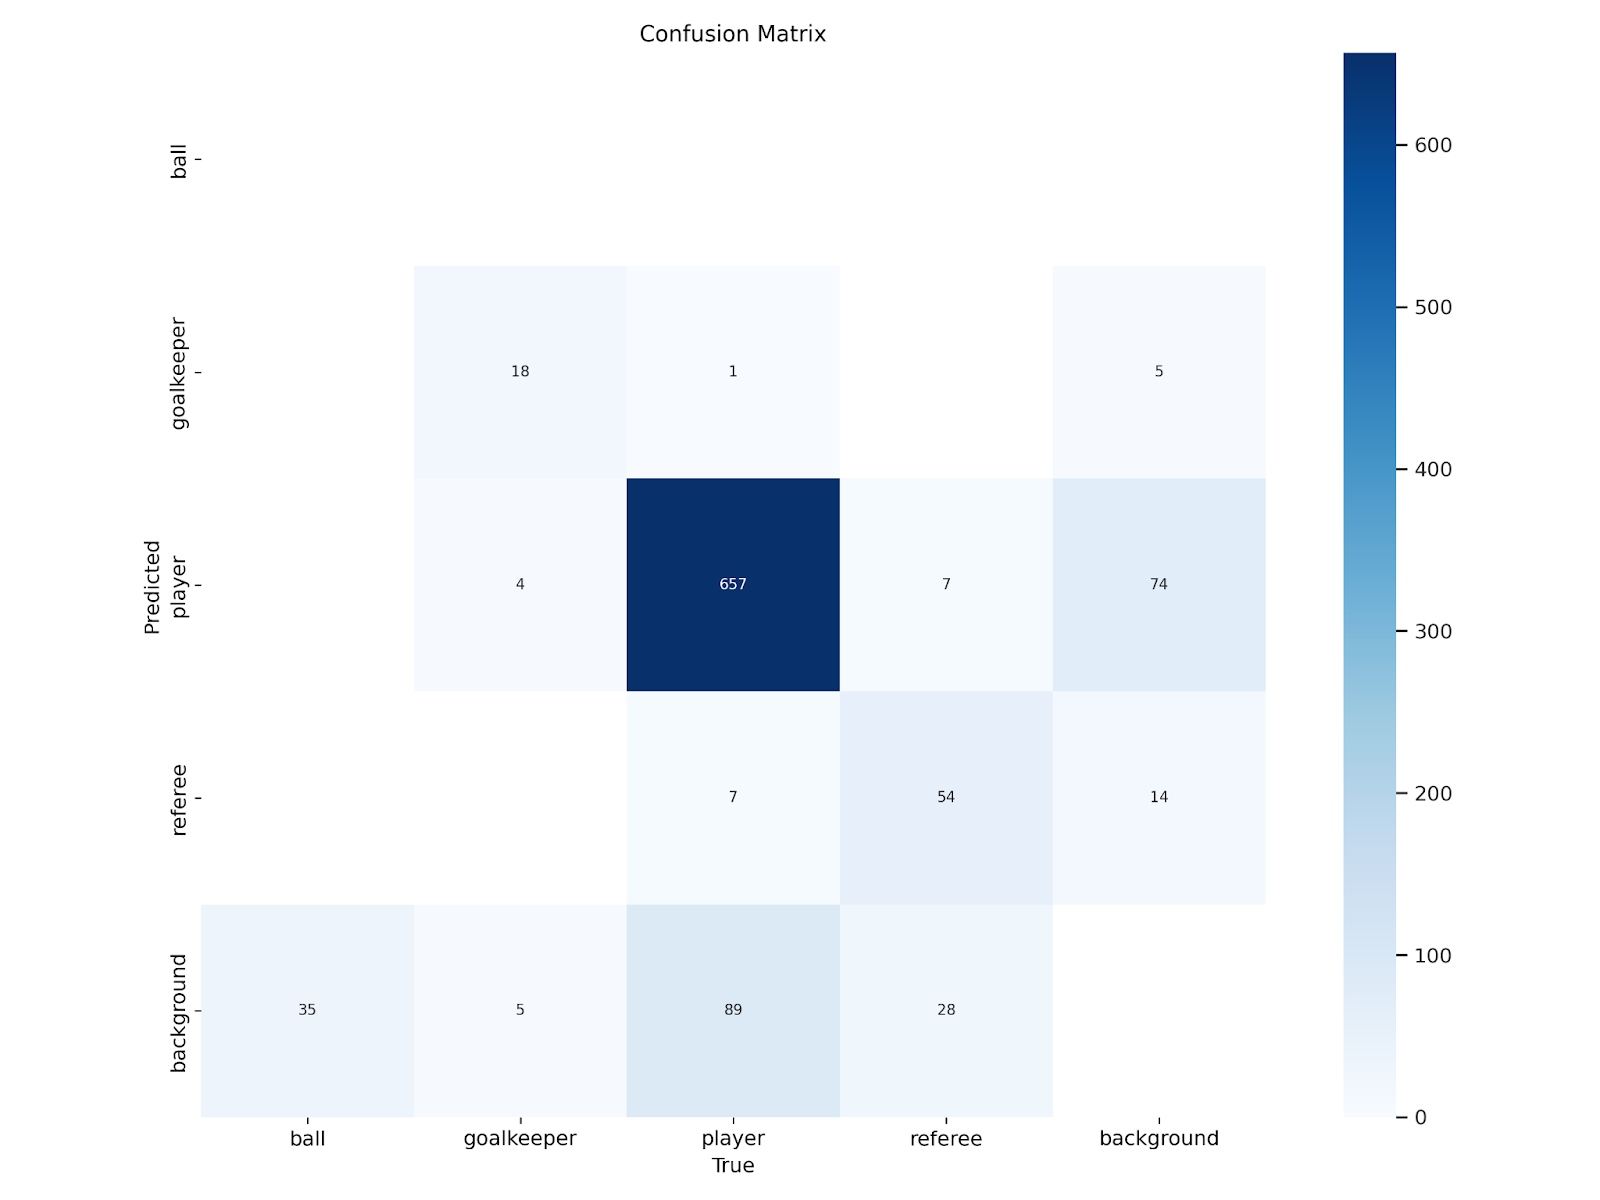
Step #4: Mannequin Analysis
We are able to consider our mannequin utilizing the analysis graphs generated after the mannequin coaching course of is accomplished. Let’s view our confusion matrix:
%cd {HOME}
Picture(filename=f'{HOME}/runs/detect/practice/confusion_matrix.png', width=600)
Right here is the confusion matrix for our dataset:
We are able to additionally analyze our mannequin coaching graphs:
%cd {HOME}
Picture(filename=f'{HOME}/runs/detect/practice/outcomes.png', width=600)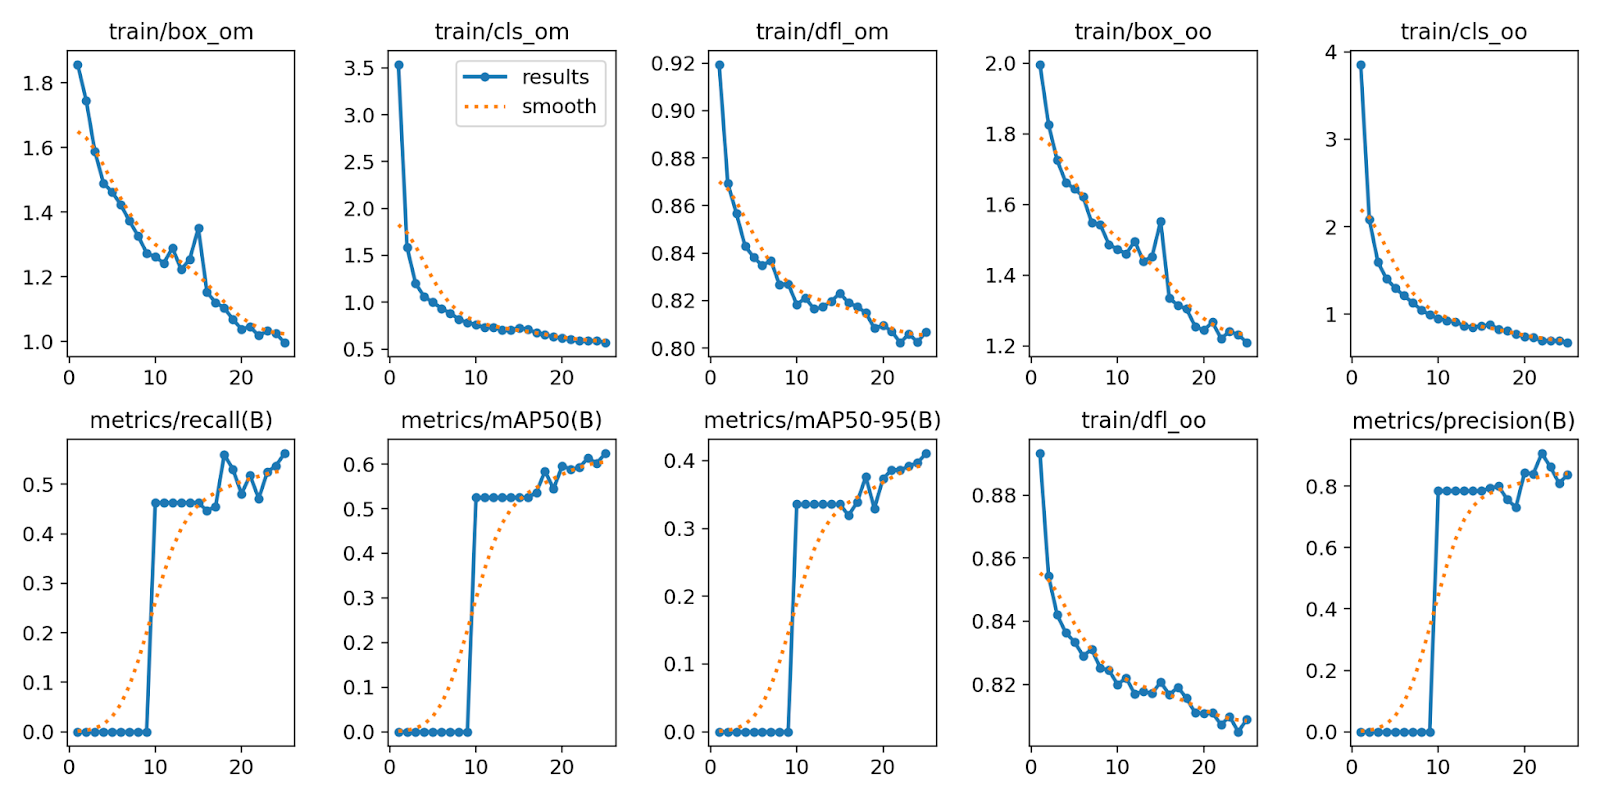
From the coaching graphs above, it’s clear our mannequin was persevering with to scale back loss. 25 epochs was too quickly to cease the coaching job, for the mannequin didn’t have sufficient alternative to converge. Thus, we suggest coaching for 100 epochs for optimum efficiency.
Conclusion
YOLOv10 is a brand new real-time object detection mannequin developed by researchers from Tsinghua College. YOLOv10 performs higher when it comes to velocity and accuracy in comparison with different YOLO fashions accessible corresponding to YOLOv9 and YOLOv8.
On this information, we walked by way of easy methods to practice a YOLOv10 mannequin. We put in the mannequin from supply, downloaded a dataset to be used in coaching our mannequin, then educated the mannequin. We then evaluated our mannequin utilizing the confusion matrix and coaching graph charts.
To be taught extra about YOLOv10, we suggest studying the complete YOLOv10 paper.