YOLOv10, launched in Might 2024, is an object detection mannequin structure developed by researchers from Tsinghua College.
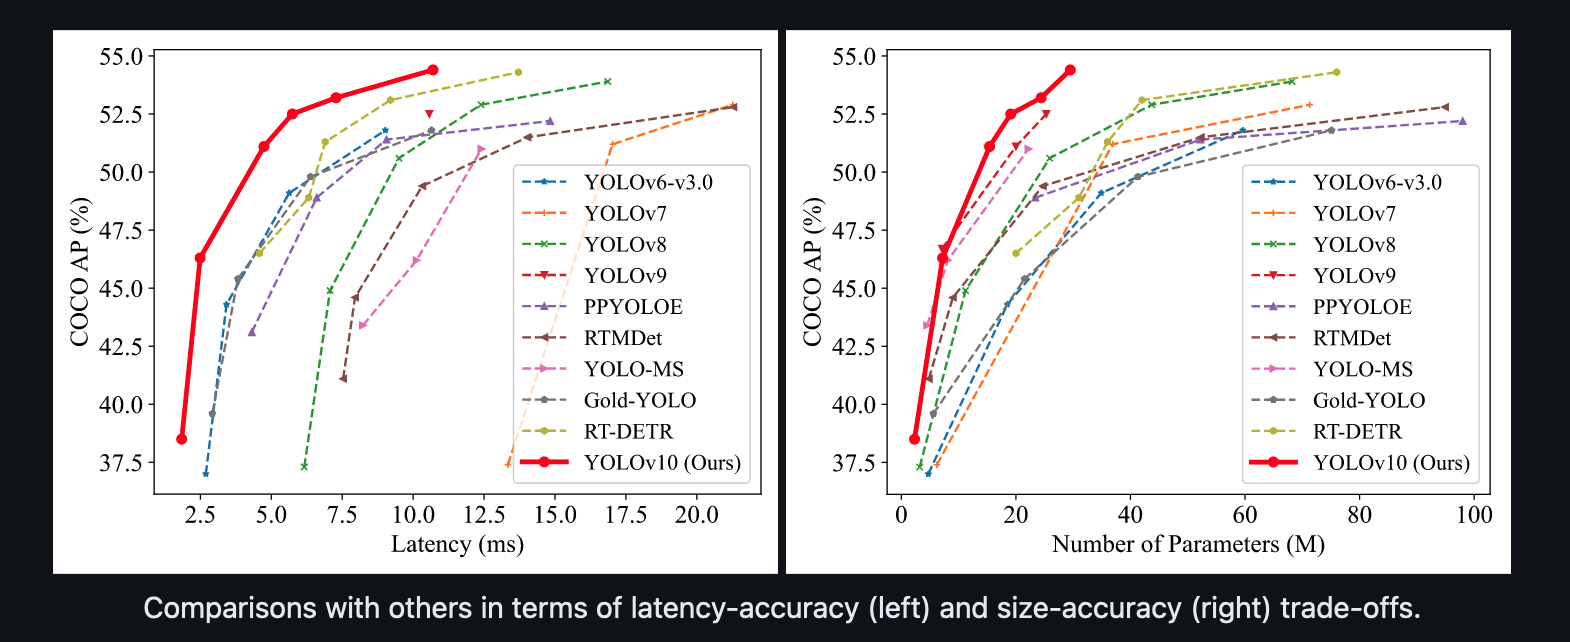
At its launch, YOLOv10 achieved state-of-the-art accuracy on object detection duties, evaluated utilizing the industry-standard COCO benchmark dataset. YOLOv10 additionally runs sooner than different object detection fashions reminiscent of YOLOv8 and YOLOv9.
Now you can deploy YOLOv10 fashions with Roboflow within the cloud, or on system utilizing Inference.
Inference is an open supply pc imaginative and prescient inference server with which you’ll run imaginative and prescient fashions at excessive speeds. Inference can run in a Docker container, perfect for deploying your mannequin as a microservice, or with a Python bundle that you may combine straight into your purposes.
On this information, we’re going to stroll by way of methods to deploy YOLOv10 fashions with Roboflow each within the cloud and on system with Inference.
With out additional ado, let’s get began!
Step #1: Create a Dataset
To deploy a mannequin with Roboflow, it’s good to add a dataset. You may export your knowledge to be used in coaching YOLOv10 fashions by yourself {hardware}. By importing your dataset to Roboflow, you may apply augmentations and preprocessing steps to pictures and management completely different variations of your knowledge.
First, create a free Roboflow account. Then, go to your Roboflow dashboard and click on “Create a Challenge”.
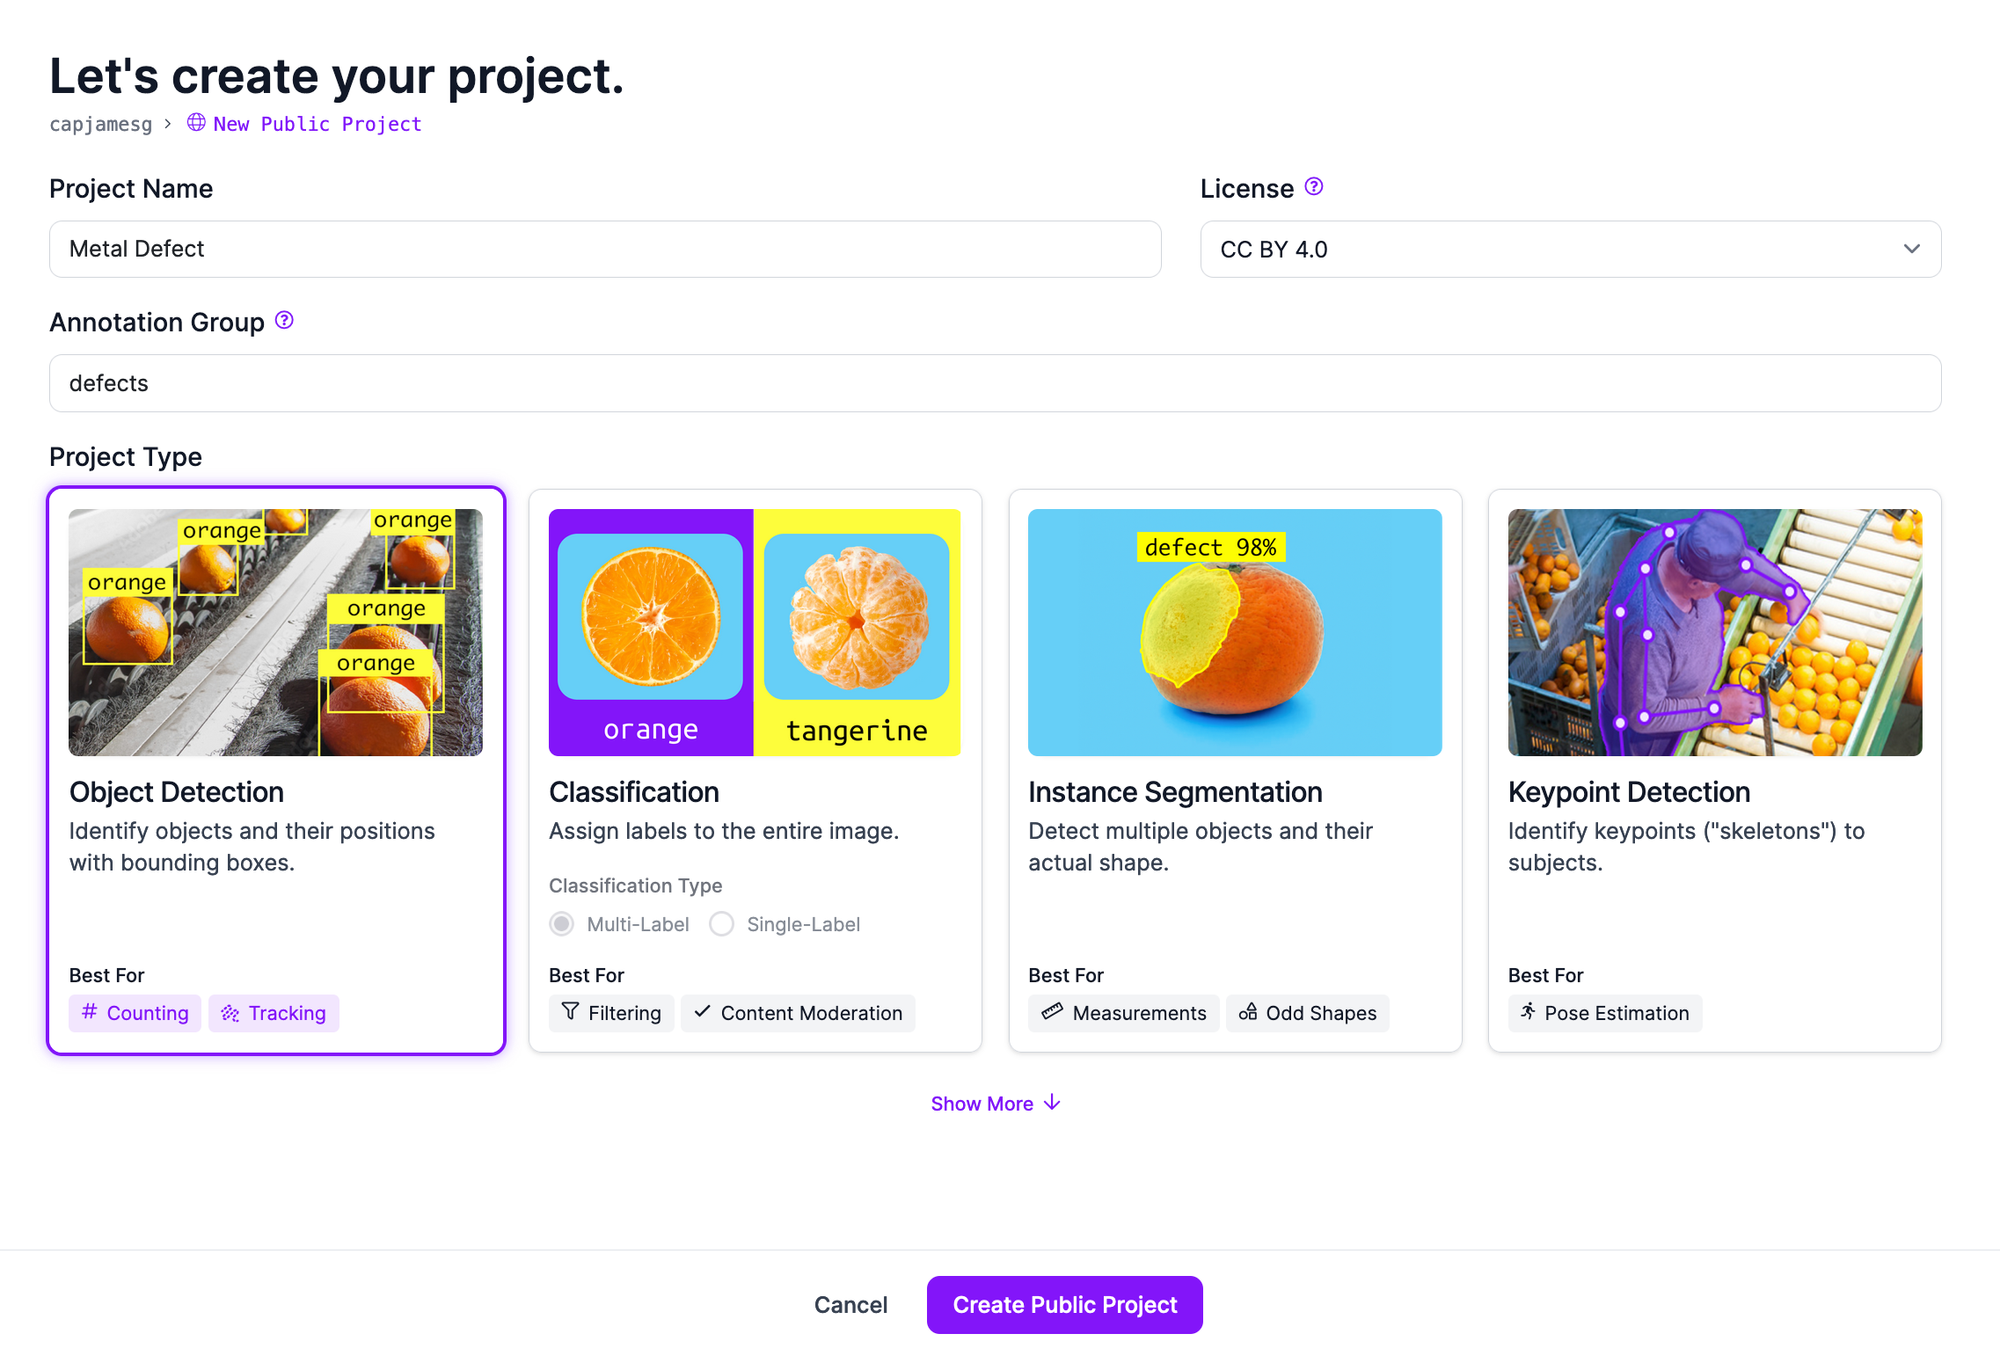
Choose “Object Detection” as your venture kind, and select a reputation on your venture. When you’re prepared, click on “Create Challenge” on the backside of the web page to create your venture.
You’ll then be requested to add your knowledge. You may add labeled or unlabeled photos. When you have any unannotated knowledge, you may label these photos with Roboflow Annotate, a web-based suite of annotation instruments for pc imaginative and prescient.
To add your knowledge, drag and drop your photos and annotations:
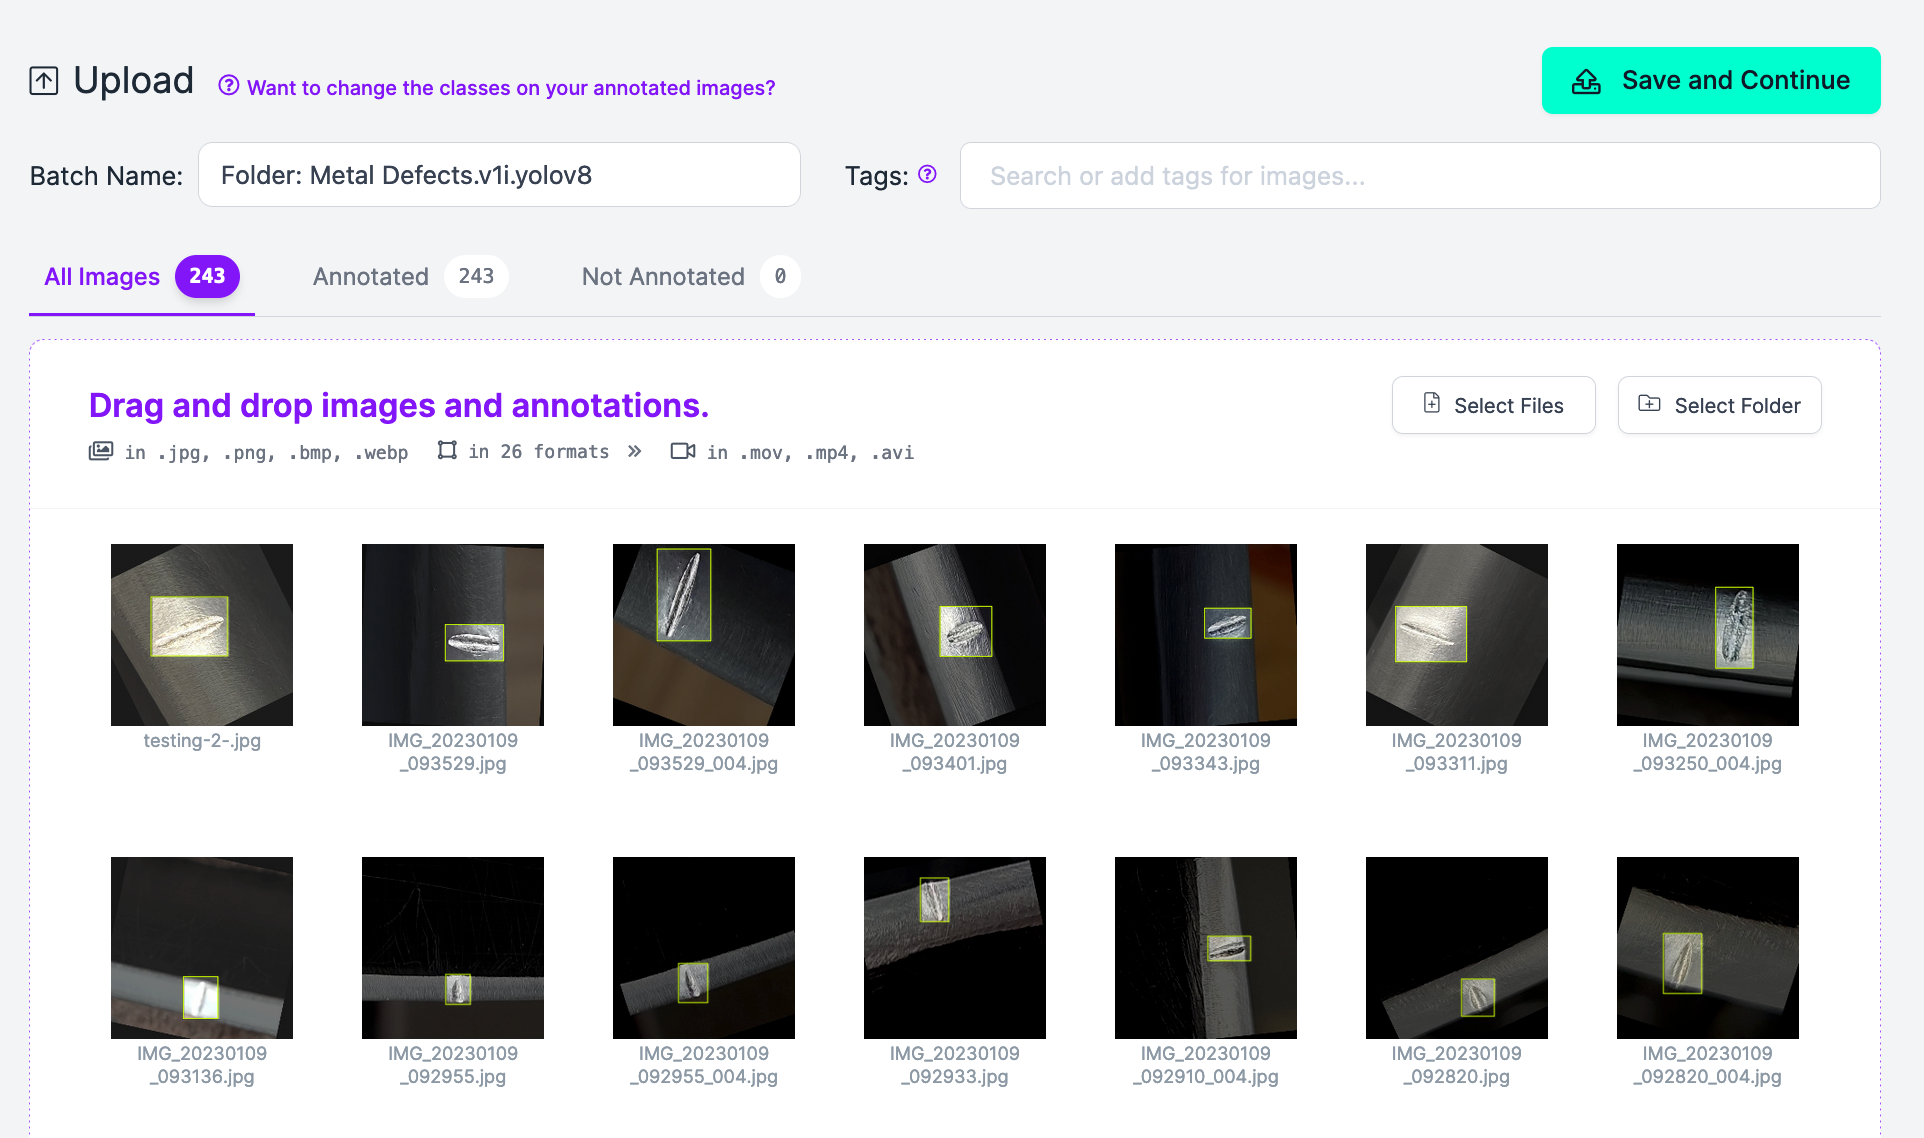
Click on “Save Proceed” to add your knowledge.
Your knowledge is now obtainable in Roboflow.
Subsequent, it’s good to create a dataset model. It is a snapshot of your dataset, frozen in time. You may apply augmentations and preprocessing steps to pictures in your dataset, which can allow you to enhance mannequin efficiency.
To create a dataset model, click on “Generate” within the Roboflow sidebar. You’ll then have the ability to configure your dataset era job. Discuss with our preprocessing and augmentation information to study extra concerning the processing steps obtainable and which of them could also be proper on your venture.
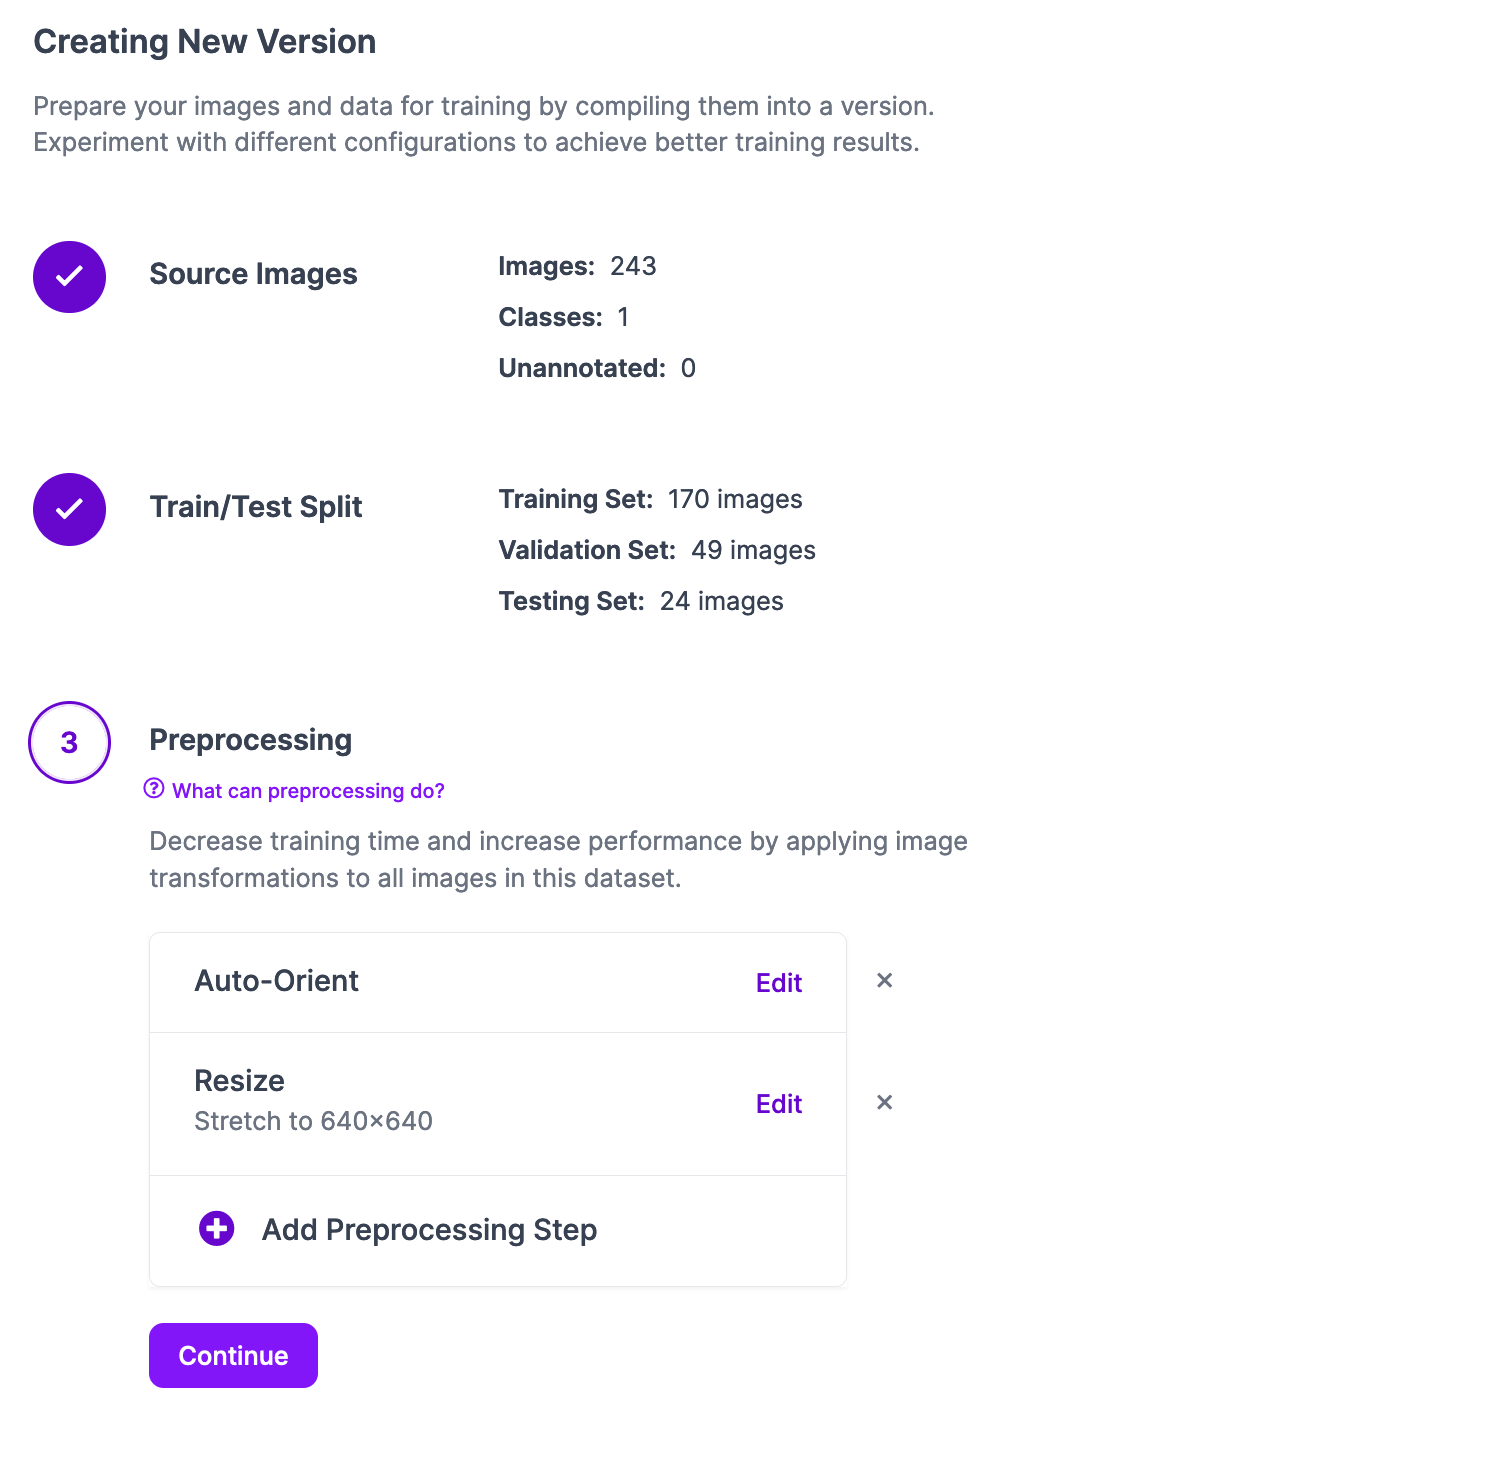
After getting configured your dataset model, click on “Create”. A model of your dataset shall be generated with which you’ll prepare your mannequin.
Step #2: Practice a Mannequin
You may deploy YOLOv10 fashions to Roboflow which have been educated utilizing any compute supply and uploaded to Roboflow.
Now we have ready a pocket book that you should use to coach your mannequin. This pocket book walks by way of every part it’s good to know, from downloading your dataset from Roboflow to coaching a mannequin with the YOLOv10 venture.
Step #3: Deploy a YOLOv10 Mannequin
Along with your mannequin educated, you may deploy it within the Roboflow cloud or by yourself {hardware}.
Whether or not you wish to deploy your mannequin within the cloud or in your {hardware}, you need to first add your weights to Roboflow. These weights can then be downloaded by Roboflow Inference, which helps you to run imaginative and prescient fashions in a Docker container or by way of a Python bundle in your {hardware}.
To add your YOLOv10 mannequin, use the next code:
!pip set up roboflow from roboflow import Roboflow
rf = Roboflow(api_key="API_KEY")
venture = rf.workspace().venture("model-name")
model = venture.model(1)
model.deploy("yolov8")
Above, substitute:
model-nametogether with your Roboflow mannequin ID.API_KEYtogether with your Roboflow API key.1together with your venture model ID.
When you run this code, your mannequin weights shall be uploaded to Roboflow.
You’ll then have the ability to use your mannequin by way of the Roboflow net interface, within the cloud, and by yourself {hardware}.
To deploy your mannequin within the cloud, you should use the Inference SDK, which accepts a picture and runs inference on Roboflow’s servers. To make use of the SDK, first set up it:
pip set up inference-sdkThen, create a brand new file and add the next code:
# import the inference-sdk
from inference_sdk import InferenceHTTPClient # initialize the consumer
CLIENT = InferenceHTTPClient( api_url="https://detect.roboflow.com", api_key="API_KEY"
) # infer on an area picture
outcome = CLIENT.infer("YOUR_IMAGE.jpg", model_id="model-name/1")
Above, substitute:
model-nametogether with your Roboflow mannequin ID.API_KEYtogether with your Roboflow API key./1together with your venture model ID.YOUR_IMAGE.jpgwith the identify of the picture on which you wish to run inference.
Once you run this code, your mannequin will run in your picture within the cloud and the outcomes shall be obtainable within the outcome variable.
You can too deploy your mannequin by yourself {hardware}, reminiscent of an NVIDIA Jetson, a Raspberry Pi, or a server. To take action, first set up Inference and set your Roboflow API key in your atmosphere:
pip set up inference
export ROBOFLOW_API_KEY=””
Then, create a brand new file and add the next code:
import inference
import supervision as sv
import cv2 image_file = "picture.jpg"
picture = cv2.imread(image_file) mannequin = inference.get_model("model-name/1") outcomes = mannequin.infer(picture) detections = sv.Detections.from_roboflow(outcomes[0].dict(by_alias=True, exclude_none=True)) bounding_box_annotator = sv.BoundingBoxAnnotator()
label_annotator = sv.LabelAnnotator() annotated_image = bounding_box_annotator.annotate( scene=picture, detections=detections)
annotated_image = label_annotator.annotate( scene=annotated_image, detections=detections) sv.plot_image(annotated_image)
Above, substitute:
model-nametogether with your Roboflow mannequin ID./1together with your venture model ID.YOUR_IMAGE.jpgwith the identify of the picture on which you wish to run inference.
Once you run this code for the primary time, the mannequin weights on your YOLOv10 mannequin shall be downloaded onto your system. They are going to then be loaded into reminiscence and used to run inference in your picture. With this methodology, all inference runs in your system.
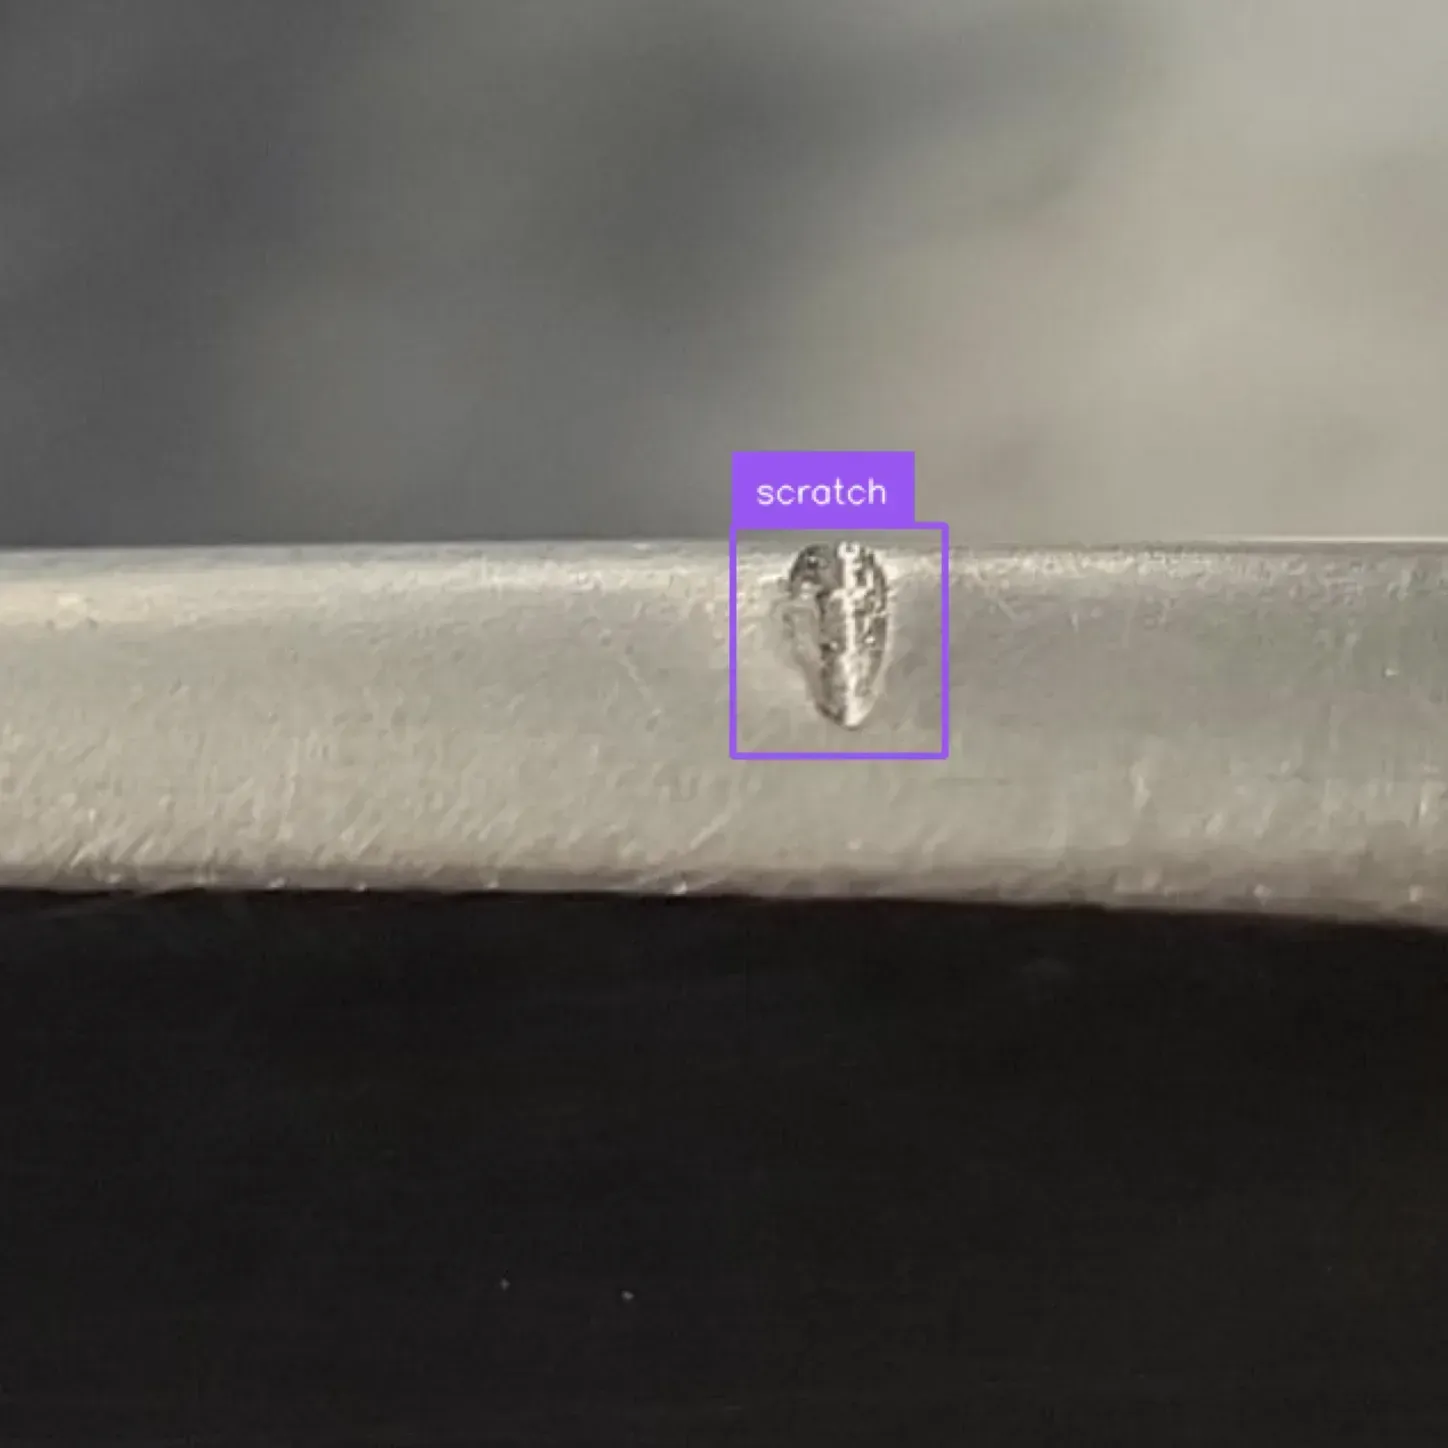
You may see the outcomes of inference within the outcomes object:
Conclusion
YOLOv10 is a state-of-the-art object detection mannequin. YOLOv10 achieves larger accuracy than earlier YOLO fashions, reminiscent of YOLOv8 and YOLOv9, whereas working sooner.
On this information, we walked by way of methods to deploy a YOLOv10 mannequin with Roboflow. First, we created a dataset in Roboflow. Then, we educated a mannequin. Lastly, we uploaded the mannequin weights to Roboflow to be used in cloud and on system deployment.
To study extra concerning the structure of YOLOv10, consult with our What’s YOLOv10? information.