Utilizing laptop imaginative and prescient, you possibly can precisely monitor intermodal containers in a yard. For instance, by including a digicam to any hostler truck, you possibly can passively acquire container location knowledge for a steady stream of real-time info. The footage from this digicam can then be processed to retrieve the chassis ID, container ID, container model, and every other visible info it is advisable to report.
On this information, we’re going to talk about the right way to construct a yard administration system with laptop imaginative and prescient. Here’s a video that exhibits the mannequin we are going to construct in use on footage from an intermodal container yard:
Laptop imaginative and prescient refers to trendy machine studying strategies that establish the placement of objects in photographs. Once we can establish the placement of objects – for instance, ID numbers – we are able to apply customized logic, resembling OCR, counting the variety of containers current, and extra.
By the top of this information, you should have a system that may establish the placement of containers, container IDs, chassis IDs, and logos on transport containers. We may also talk about the right way to run OCR to retrieve characters in container and chassis IDs.
Listed here are the steps we are going to observe to construct our resolution:
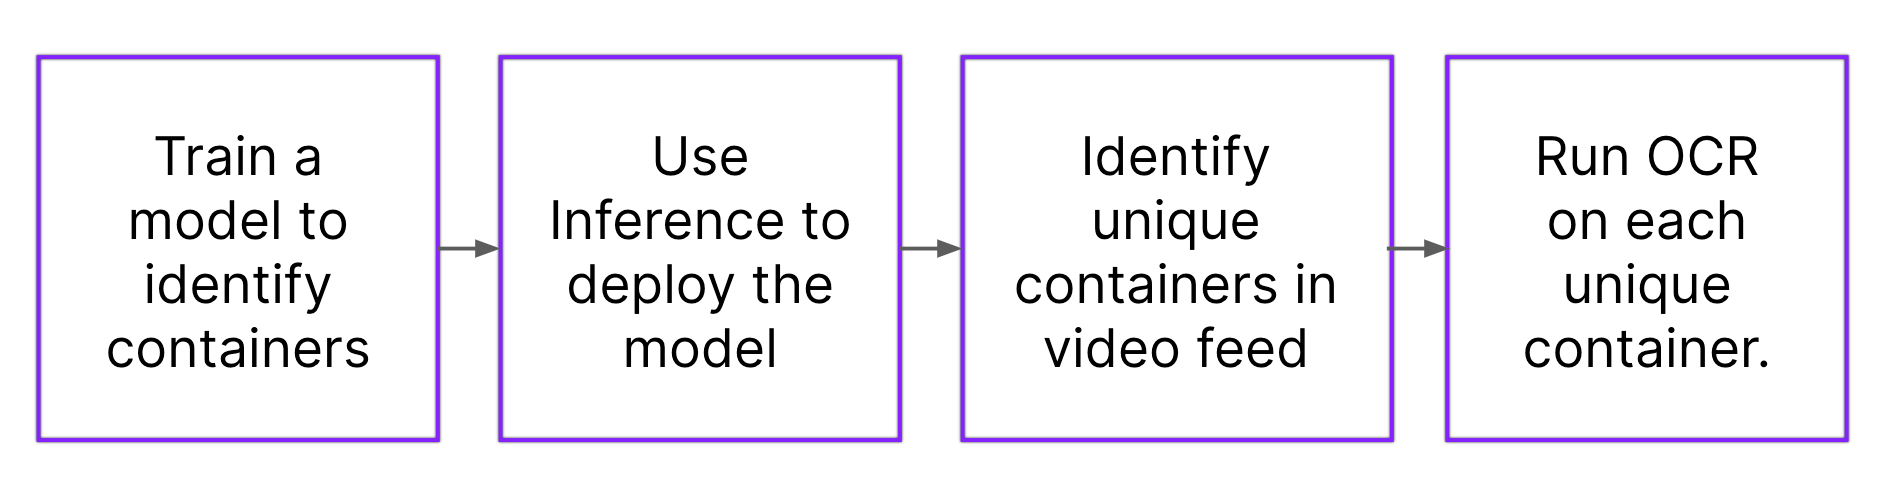
With out additional ado, let’s get began!
Step #1: Accumulate and Add Information
Laptop imaginative and prescient methods are “skilled” utilizing labeled photographs. The labels on a picture correspond with objects of curiosity. For instance, you possibly can label chassis IDs to assist a mannequin learn to establish that individual a part of a transport container.
Earlier than we are able to label photographs, we have to acquire and collect knowledge. We advocate coaching your first mannequin iteration with ~50-100 photographs.
For the most effective efficiency, we advocate recording movies within the setting wherein you’ll use this imaginative and prescient system. For instance, you can use an iPhone to report footage of transport containers in a yard you handle. You possibly can divide movies into photographs in Roboflow.
After getting collected photographs, you can begin labeling them in Roboflow.
First, create a free Roboflow account. Observe the on-screen directions to arrange your workspace. Then, click on “Create New Venture”.
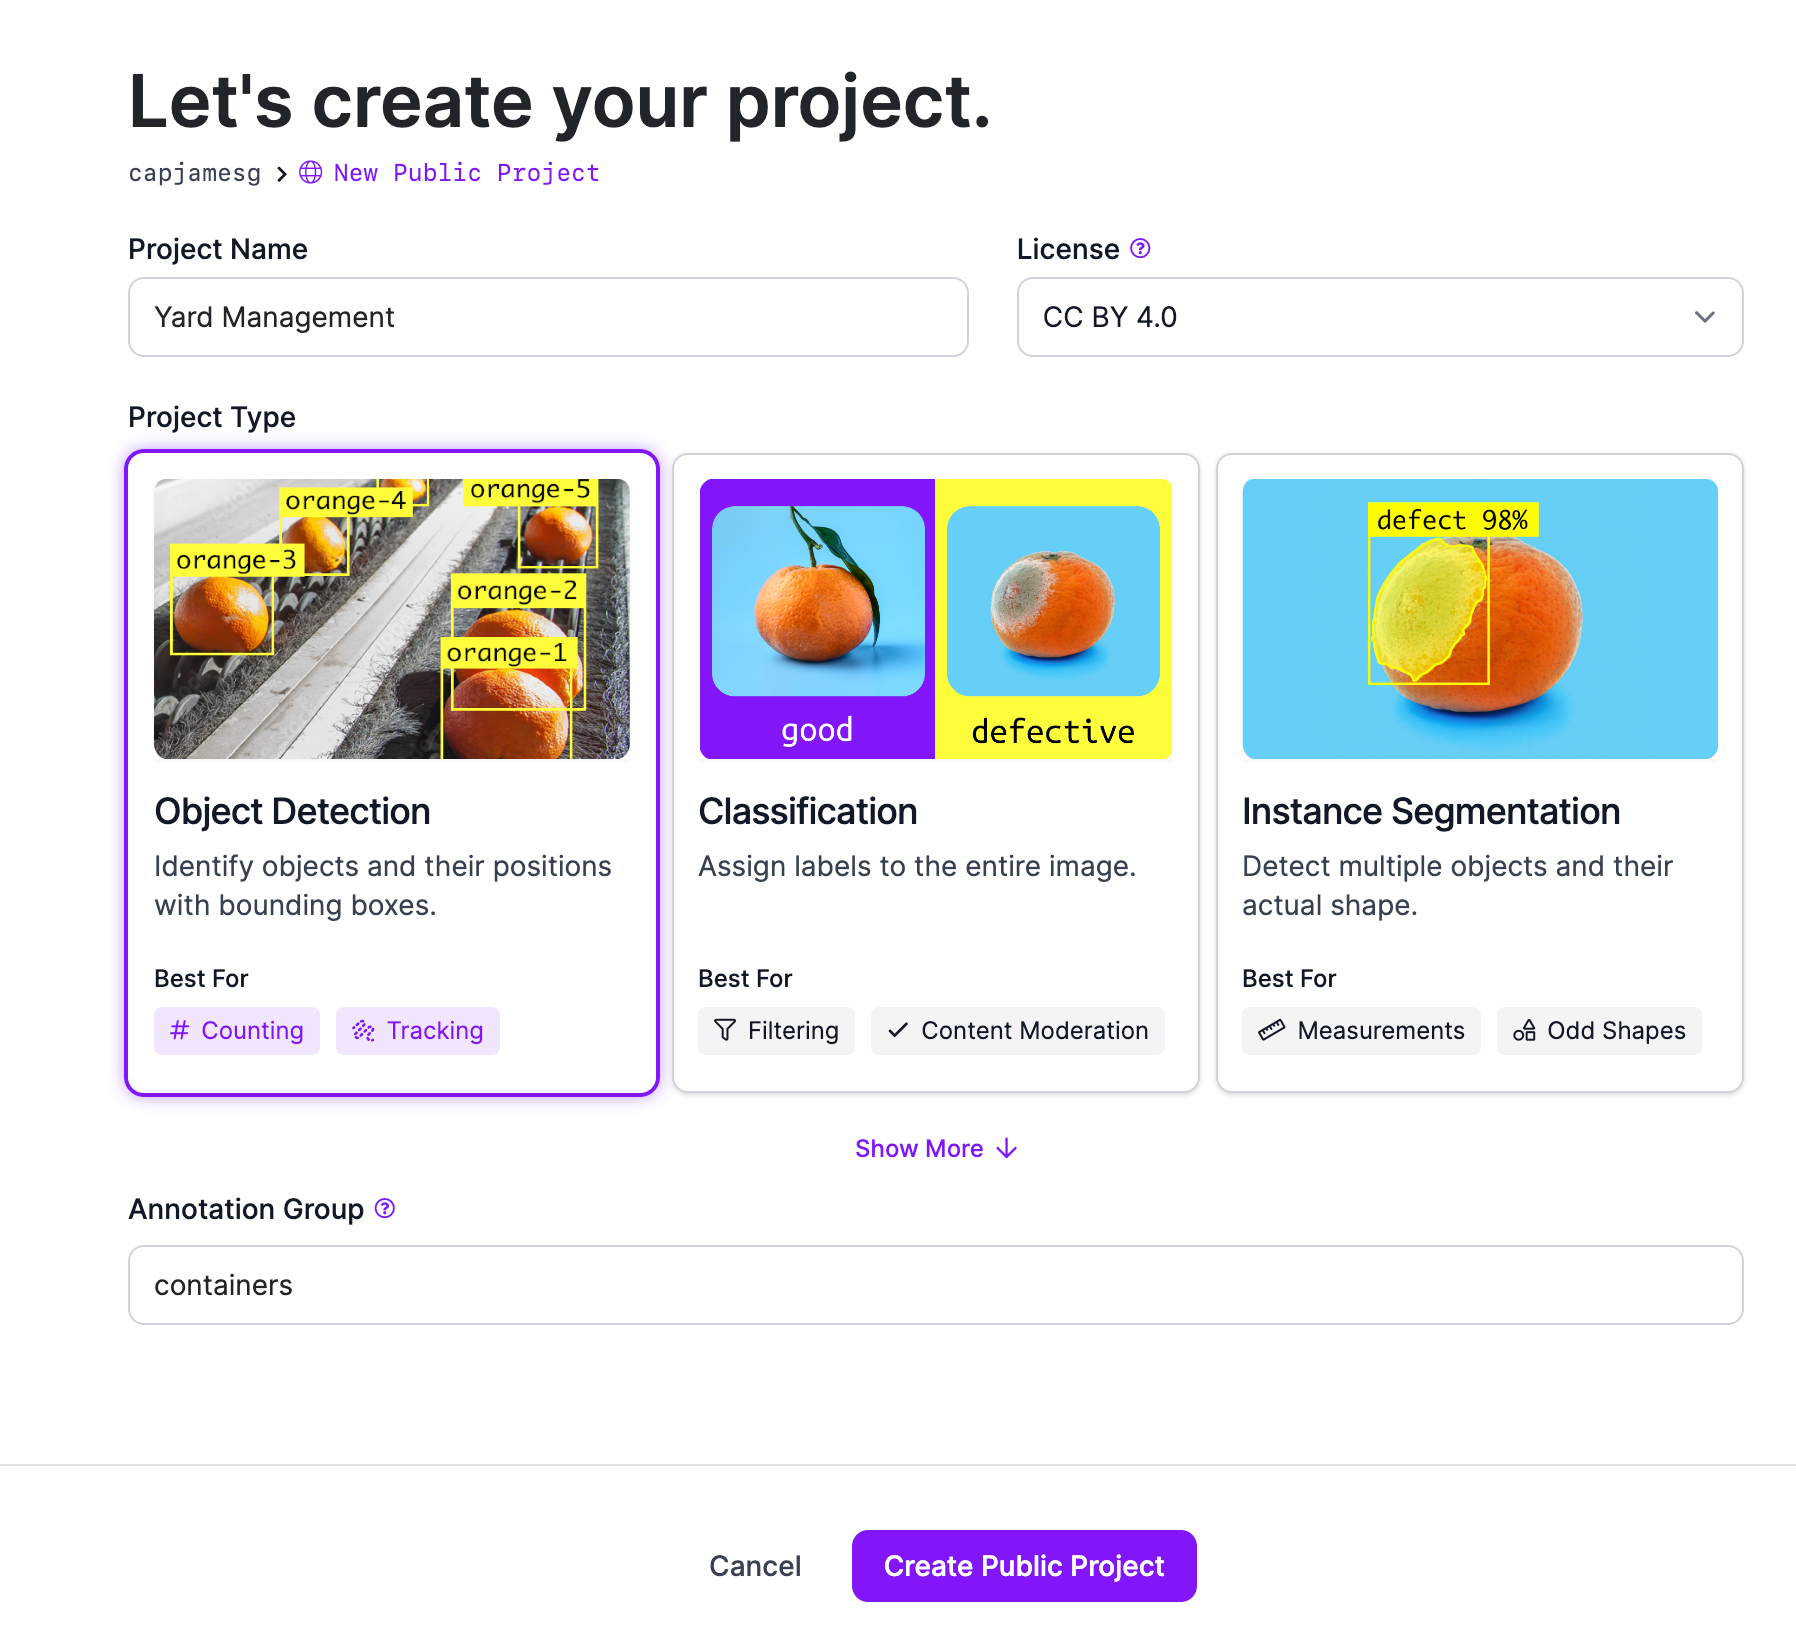
You’ll be taken to a web page with just a few fields to fill out. When requested to decide on a process sort, choose “Object Detection”. Select a reputation on your undertaking. Coaching knowledge is open supply for Public plans or you possibly can join a paid Roboflow plan to retailer photographs privately.
After getting configured your undertaking, click on “Create Venture”.
You’ll be redirected to a web page the place you possibly can add photographs you wish to label. Drag your photographs into the field on the net web page to add them to your undertaking. When the pictures have been processed, click on “Save and Proceed” to finish the add course of.

Step #2: Label Objects of Curiosity
After importing your knowledge, you can be taken to a web page the place you possibly can assign photographs to colleagues to label. With photographs in Roboflow, you can begin labeling knowledge.
After getting photographs uploaded, choose a picture to label.

When you choose a picture, you can be taken to Roboflow Annotate. Roboflow Annotate gives an in depth suite of instruments to be used in picture annotation. For this information, we are going to use the bounding field annotation software. After getting skilled the primary model of your mannequin, you should utilize our model-assisted labeling to make use of your current mannequin model to auto-label knowledge.
A bounding field, mixed with a category title, is a label that describes a area of a picture. To attract a bounding field, press “b” in your keyboard, click on the place you wish to begin your field, and drag till you’ve annotated the area of curiosity. Then, choose a category from the checklist of lessons that seem, or add a brand new class.
Label each picture in your dataset with the objects you wish to establish. For instance, you may wish to establish containers, chassis IDs, and container IDs.
After getting labeled your entire knowledge, you possibly can generate a dataset model.
Step #3: Generate a Dataset Model
A dataset model is a frozen-in-time snapshot of the info in your Roboflow undertaking. You possibly can apply augmentations and preprocessing steps to dataset variations and use Roboflow to handle every model of your dataset.
Right here is an instance of a greyscale augmentation:
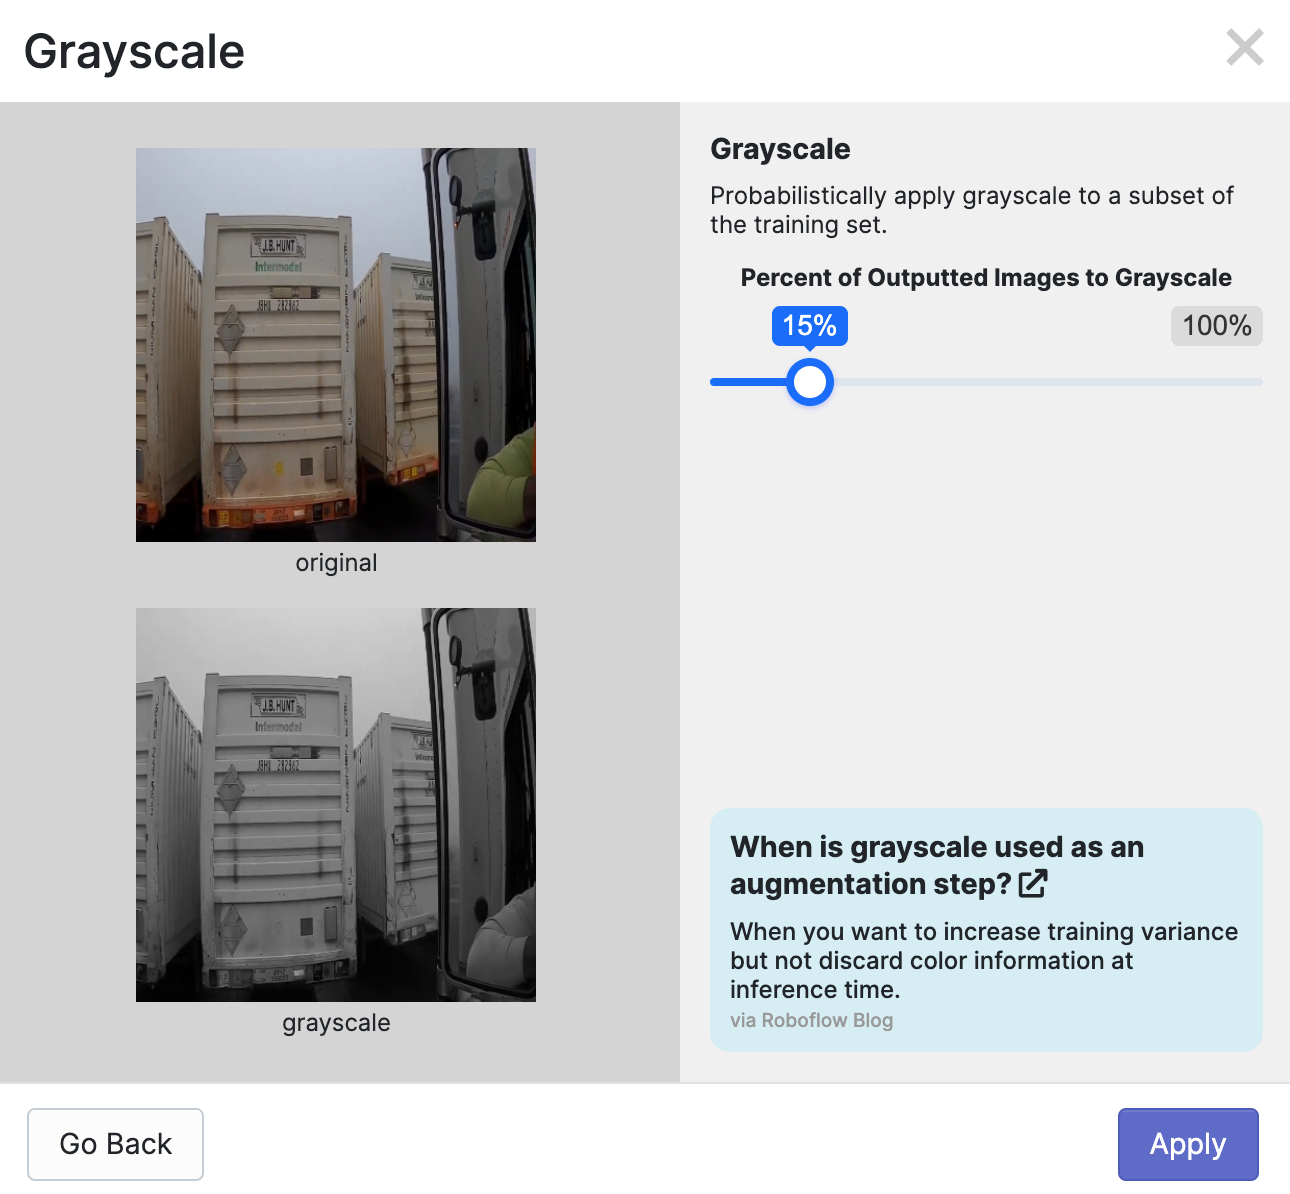
To create a dataset model, click on “Generate” within the Roboflow sidebar. You’ll then be requested what preprocessing steps and augmentations you wish to apply. For the primary model of your mannequin, we advocate leaving the preprocessing steps as they’re and making use of no augmentations.
This may let you purchase an understanding of the baseline efficiency of your mannequin. In case your mannequin does properly, you possibly can apply augmentations. In case your mannequin performs poorly, there could also be a problem with the standard of your knowledge.
To study extra about finest practices for preprocessing steps and augmentations, discuss with our preprocessing and augmentation finest practices weblog submit.
If you find yourself prepared, scroll all the way down to the underside of the web page and click on the “Generate” button. This may begin the dataset technology course of. The period of time it takes for this course of to finish depends upon what number of photographs are in your dataset.
Step #3: Prepare a Laptop Imaginative and prescient Mannequin
With a dataset model prepared, we are able to practice a yard administration mannequin. Click on the “Prepare with Roboflow” button on the web page to which you had been taken after your dataset was generated.

Observe the on-screen directions to configure your coaching job. We advocate coaching with the Quick coaching possibility on your first model. You need to practice from the COCO checkpoint on your first mannequin model. Learn extra about switch studying to see why that’s useful.
After getting configured your coaching job, a machine can be allotted to coach your mannequin. You possibly can watch the progress of your coaching job dwell within the Roboflow dashboard.
For a mannequin skilled on lower than 100 photographs, we count on coaching will take 30 minutes or much less. You’ll obtain an e mail as soon as the coaching course of completes.
Step #4: Check the Mannequin
Roboflow has an in-app testing software that you should utilize to interactively check your mannequin on photographs and movies. When your mannequin has skilled, click on “Visualize” on the left sidebar to enter into the testing interface. From right here, you possibly can add a picture, present the URL of a picture, or add a video on which you wish to run your mannequin.
Right here is an instance of our mannequin operating on a picture of a container:
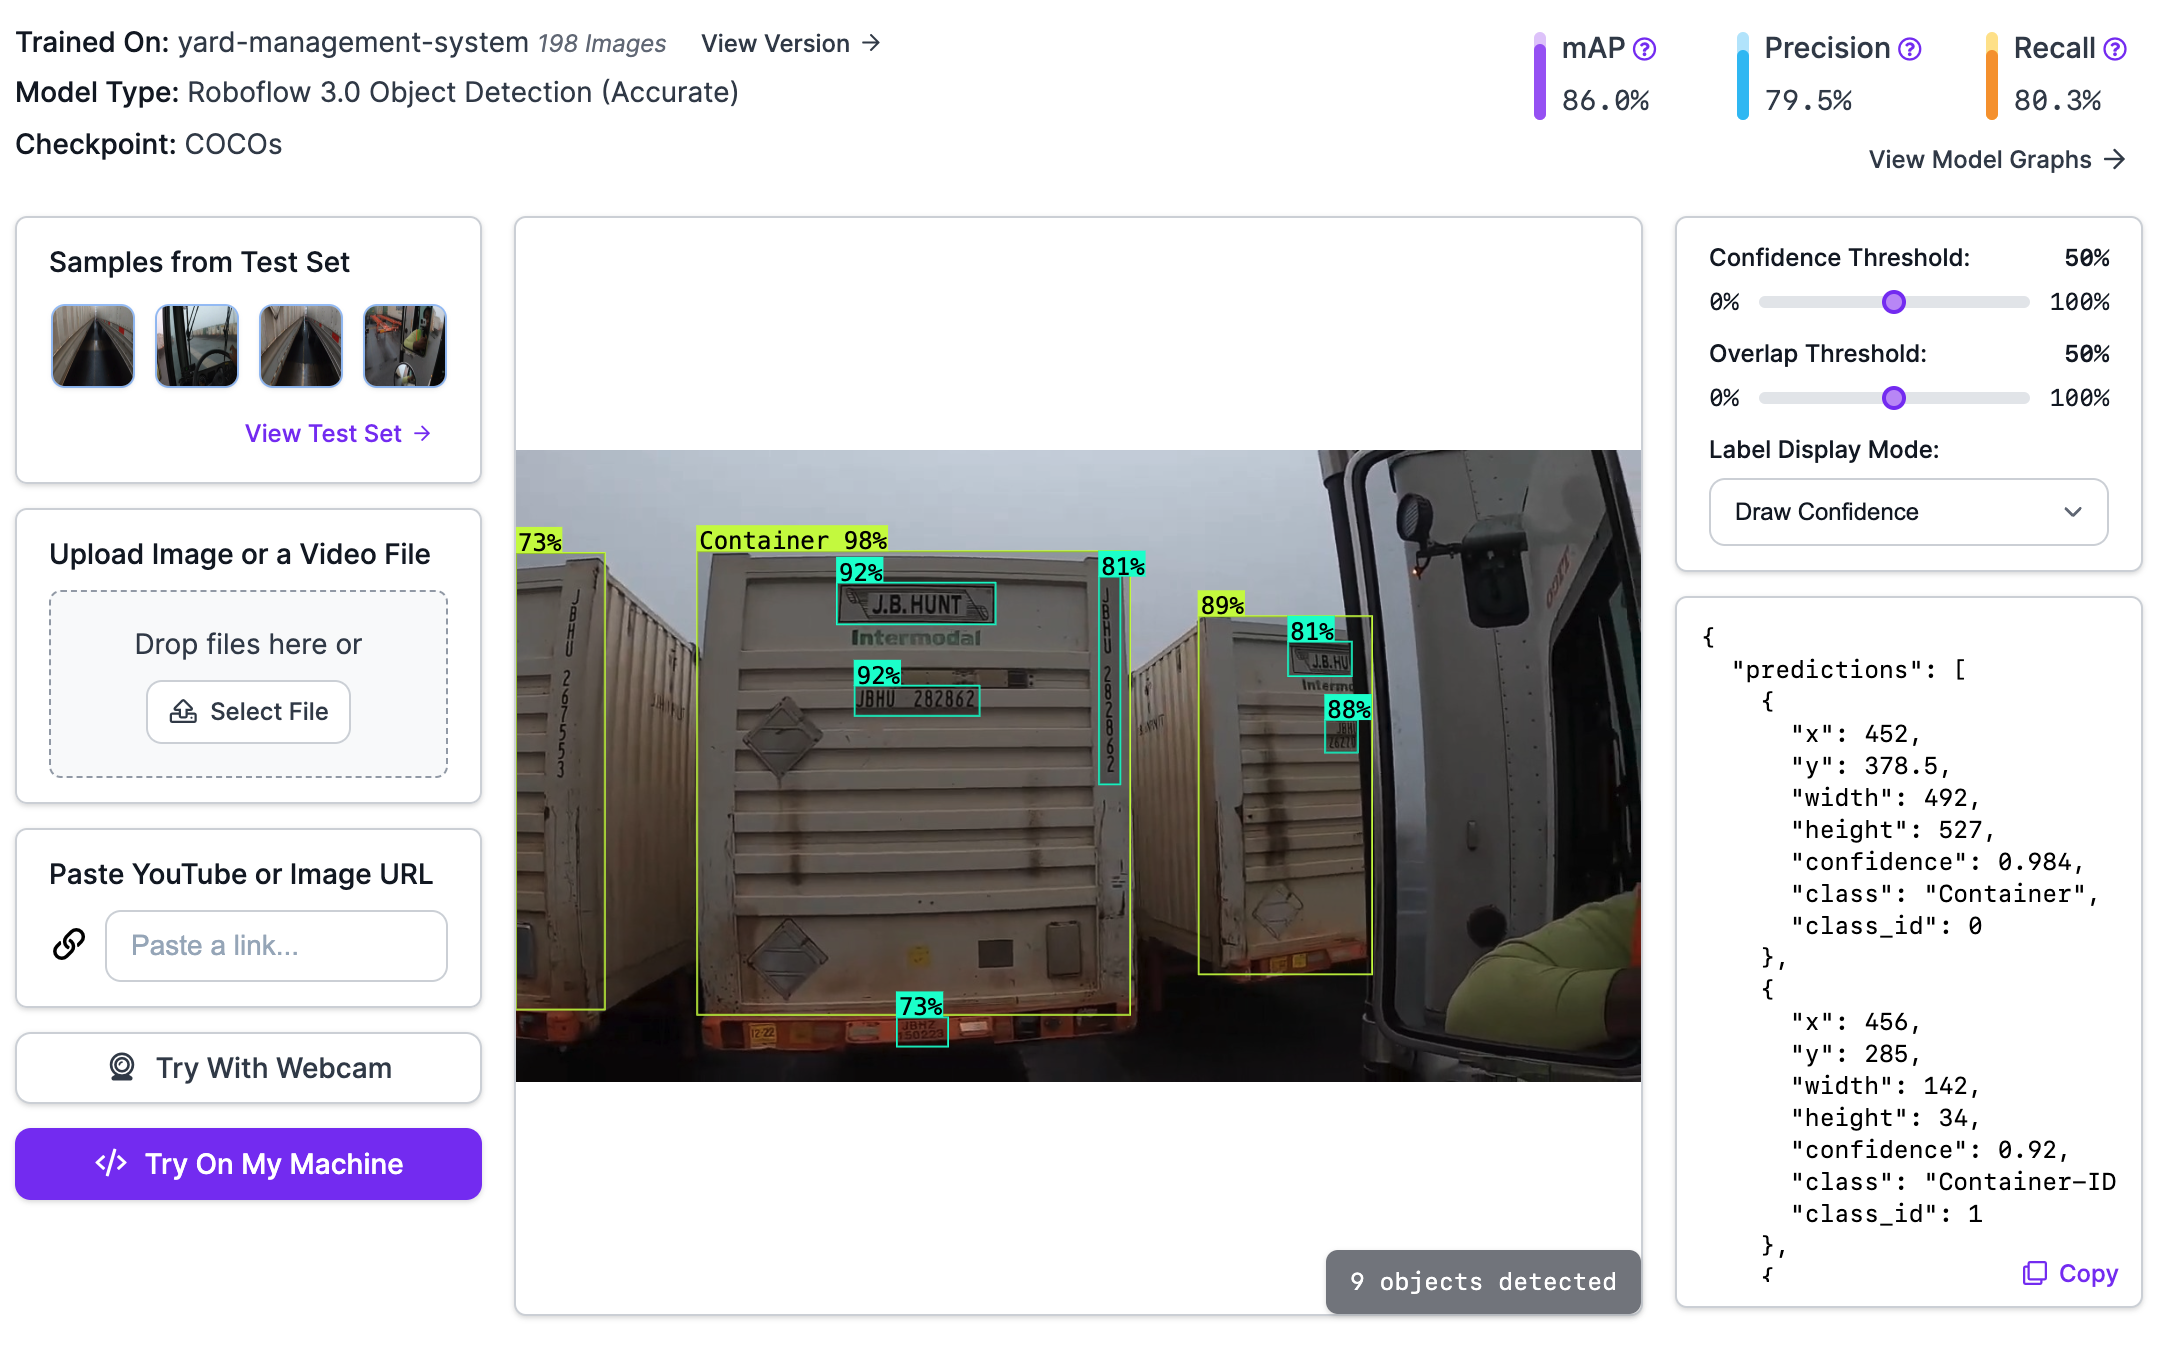
Our mannequin efficiently identifies containers, container IDs, chassis IDs, and logos in our video. Each object has a label, however some are hidden within the picture so we are able to extra simply see smaller packing containers. You possibly can see every label by clicking “Label Show Mode” after which “Draw Labels”.
Step #5: Deploy the Mannequin to the Edge
With a skilled mannequin prepared, now you can deploy your mannequin. Roboflow affords two essential deployment choices:
- Cloud, wherein you ship photographs or movies to Roboflow for processing, and;
- On-device, wherein you run fashions by yourself {hardware}.
For yard administration, we advocate operating fashions on-device. This may let you run fashions in actual time as you use autos throughout your yard. For instance, you can have a digicam connected to an NVIDIA Jetson that captures footage from a car pushed down your yard.
To deploy your mannequin by yourself {hardware}, you should utilize Roboflow Inference. Inference is a high-performance inference server via which you’ll run your personal imaginative and prescient fashions in addition to basis fashions like CLIP (classification) and DocTR (OCR).
To run your mannequin, first set up Inference on the system on which you wish to run your mannequin. You possibly can set up Inference utilizing the next command:
pip set up inferenceThen, create a brand new Python file and add the next code:
from inference import InferencePipeline
from inference.core.interfaces.stream.sinks import render_boxes pipeline = InferencePipeline.init(
    model_id="yard-management-system/1",
    video_reference=0,
    on_prediction=render_boxes,
)
pipeline.begin()
pipeline.be a part of()
Above, substitute yard-management-system/1 along with your Roboflow mannequin ID. Discover ways to retrieve your mannequin ID.
The video_reference worth allows you to specify what system you wish to use to run inference. Your default digicam needs to be 0. You may as well specify RTSP stream URLs if you wish to run inference on frames from an RTSP stream. You may as well specify a video file on which you wish to run inference.
The on_prediction callback allows you to specify a customized processing operate for frames out of your video stream. On this code, we use the render_boxes methodology. This methodology lets us visualize predictions from our mannequin out of the field. We’ll discuss extra about including enterprise logic to our system within the subsequent step.
Run the code above. A window will seem in which you’ll see the outcomes out of your mannequin.
You may as well run your mannequin within the cloud. To study extra about cloud deployment, discuss with the Roboflow API documentation.
Step #6: Configure Enterprise Logic
After you’ve a mannequin operating, you can begin writing logic that connects your mannequin to your inner methods. For instance, you can:
- Construct a system that runs OCR on the license plate and container ID when a truck enters the yard.
- Establish open places for incoming vans.
- Monitor how lengthy completely different containers spent of their parking area.
For this information, let’s give attention to the primary use case: operating OCR when a brand new container ID is recognized.
To construct this software, we might want to write logic that assigns every container a singular ID quantity. We will then seize the area of a container within the digicam feed and run OCR on that area.
For this, we’re going to use a pre-written script within the supervision Python package deal. Run the next instructions to obtain the script, navigate to the undertaking listing, and set up the required dependencies:
git clone https://github.com/roboflow/cookbooks
cd cookbooks/yard-management
pip3 set up -r necessities.txt
Within the app.py file, we use monitoring options within the supervision Python package deal to trace predictions. New objects are assigned their very own IDs. This enables us to trace objects frame-to-frame.
We use the supervision DetectionsSmoother to clean detections on every body. When a container crosses the primary third of the video, the container is captured and saved in a folder referred to as “outcomes”. We will then run OCR on that folder when now we have completed recording.
We advocate operating OCR on a separate system for optimum efficiency. It is because OCR can take just a few seconds to run. Operating OCR synchronously would influence the efficiency of our digicam recording.
You will want to export your Roboflow API key into your setting so you possibly can authenticate with Roboflow and run the script.
To export your API key into your setting, run:
export ROBOFLOW_API_KEY="key"To run the script, run:
python3 app.py --video=video.mp4 --model-id=mannequin/1 --output=output.mp4Above, substitute:
video.mp4with the title of the file on which you wish to run inference.mannequin/1along with your Roboflow mannequin ID. Discover ways to retrieve your mannequin ID.output.mp4with the title of the file you wish to create that exhibits all of your predictions.
The script will save an annotated model of your video to the file output.mp4.
Right here is the output.mp4 file generated by our script:
Each distinctive transport container is saved within the outcomes folder. Listed here are just a few:
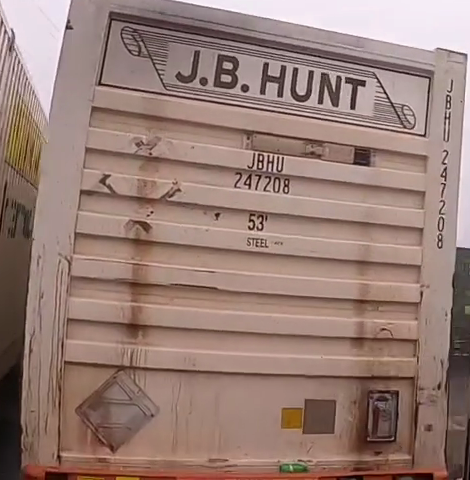
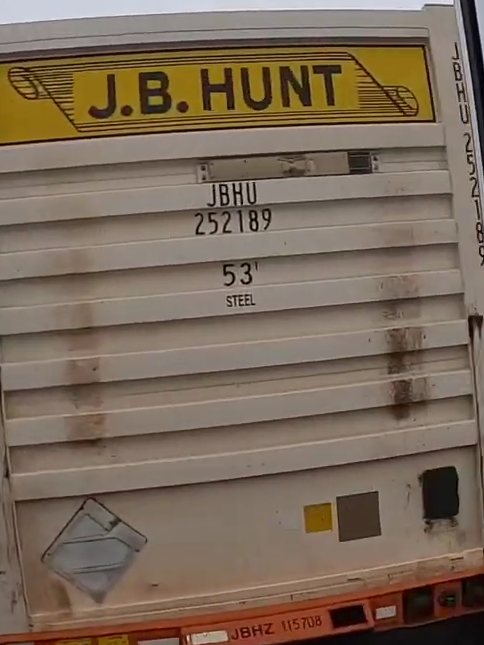
Outcomes from OCR can be saved in a file referred to as ocr_results.json. Listed here are the outcomes from the 2 containers above:
"J.B.HUNT | JBHU | 247208 | / | 53' | STEELare | " "J.B.HUNT | JBHU | 252189 | 53' | STEEL | JBHZ115708 | "The | character signifies the beginning of a brand new sequence of textual content.
In each situations, our script was capable of learn:
- The emblem
- The container ID (i.e.
JBHU 252183).
Within the second picture, the chassis ID (JBHZ115708), seen within the picture, was additionally learn precisely.
Conclusion
You should use laptop imaginative and prescient for yard stock administration. On this information, we walked via the right way to construct a yard administration system with laptop imaginative and prescient. We skilled a mannequin to establish objects of curiosity. These included transport containers, container IDs, and chassis IDs.
We then examined the mannequin on a picture. After testing our mannequin, we used a script to establish distinctive containers in a video and run OCR on these containers. This OCR logic may very well be built-in along with your inner system for monitoring the placement of containers.
In the event you want help integrating Roboflow into your yard administration system, contact the Roboflow gross sales workforce. The Roboflow workforce has experience working with crucial infrastructure suppliers on wants from security to stock administration.